Als u niet zeker bent over de instellingen voor Maximum Render Quality (MRQ) en Maximum Bit Depth (MBD) van Premiere Pro, bent u niet de enige. Het zijn behoorlijk ingewikkelde dingen en het helpt niet dat de officiële documentatie moeilijk te vinden is.
Dus waarom zien we deze in zowel de volgorde-instellingen als in de exportinstellingen? En hoe beïnvloeden ze onze video? In dit artikel gaan we in op hoe en wanneer deze instellingen werken, zodat je de beste keuze kunt maken voor je eigen projecten.
Als u geen tijd heeft om alle technische details te lezen, kunt u direct doorgaan naar de conclusie. (TL;DR zet gewoon beide instellingen aan in zowel Volgorde-instellingen als Exportinstellingen.)
Aan het einde van het artikel vindt u ook de tests die ik heb gebruikt om te laten zien hoe deze instellingen de exporttijden en de beeldkwaliteit beïnvloeden. Hier wordt tijdens het artikel naar verwezen.
Inhoud
Waar vinden we deze instellingen?
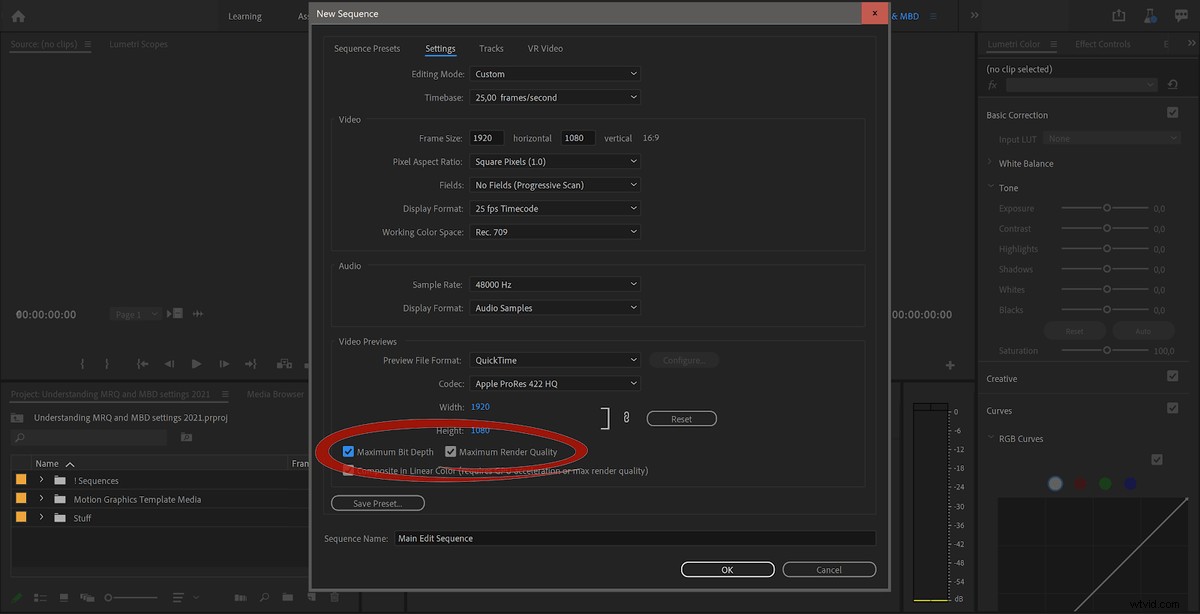
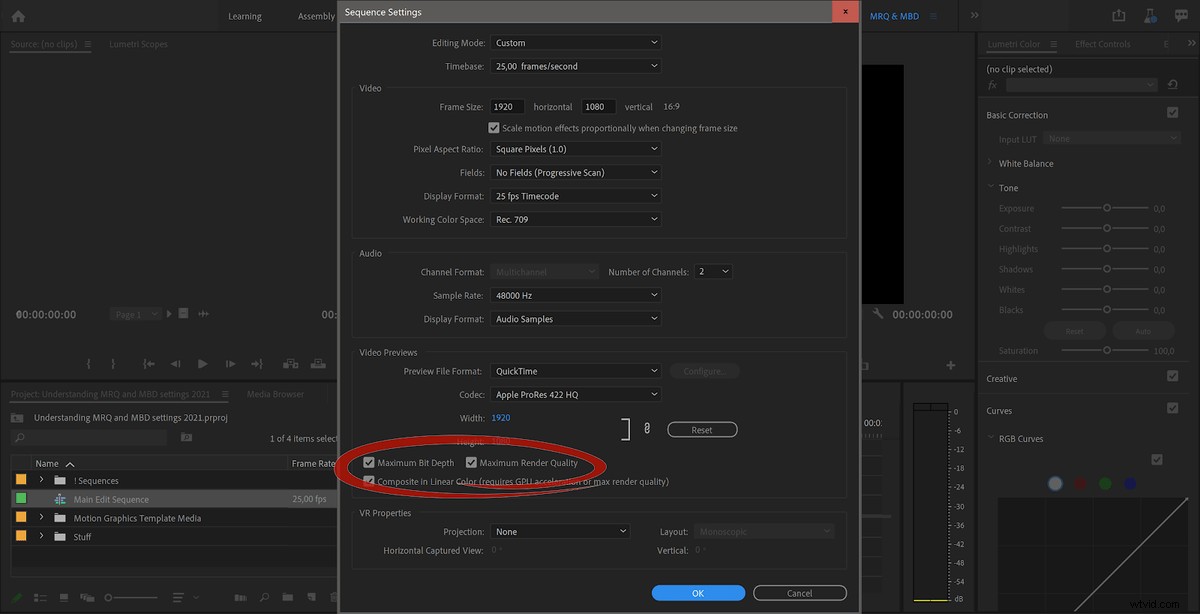
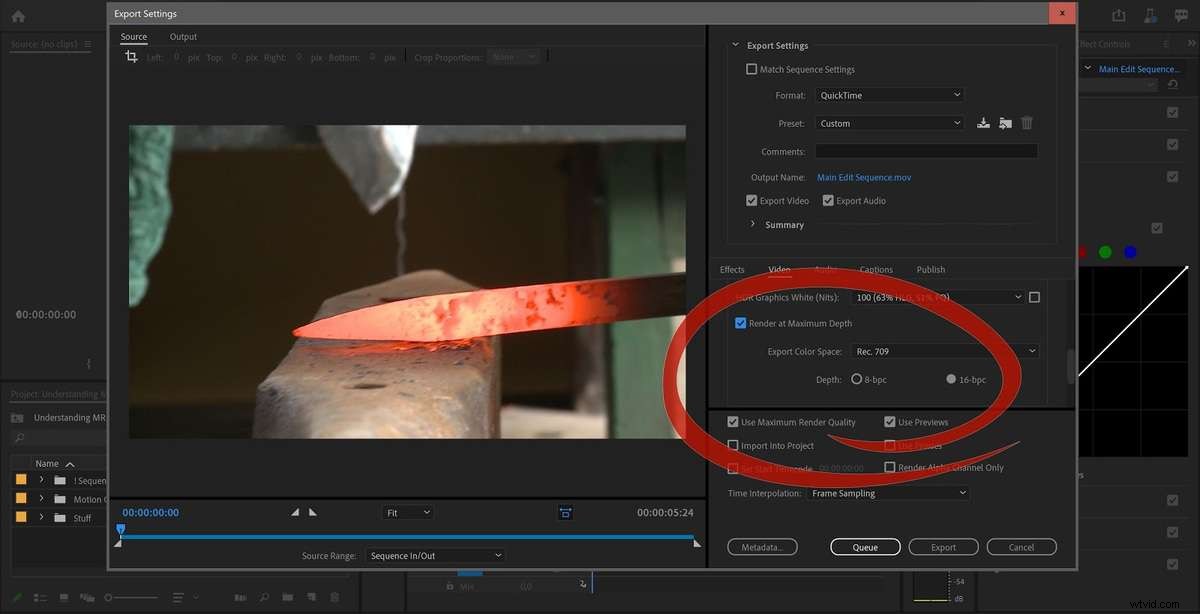
U vindt zowel de Maximale weergavekwaliteit en de Maximale bitdiepte instellingen op ten minste drie verschillende plaatsen in Premiere Pro:in de Nieuwe reeks dialoogvenster, in de Sequentie-instellingen en in de Exportinstellingen .
Als u handmatig een nieuwe reeks maakt in Premiere Pro (Bestand> Nieuw> Reeks ), ziet u dit dialoogvenster.
Als je al een sequentie hebt gemaakt en niet op de instellingen hebt gelet, kun je naar de sequentie-instellingen gaan (Sequence> Sequence-instellingen ) en verander ze daar.
Wanneer je je tijdlijn exporteert, zie je dezelfde instellingen, één onder de Video tabblad en één in het onderste deel van het vak.
Oké, met dat uit de weg, laten we eens kijken wat er gebeurt als je deze instellingen in je reeks inschakelt.
Je wordt gewaarschuwd
Ja, als je ervoor kiest om een van deze twee instellingen te activeren, krijg je de volgende waarschuwing.
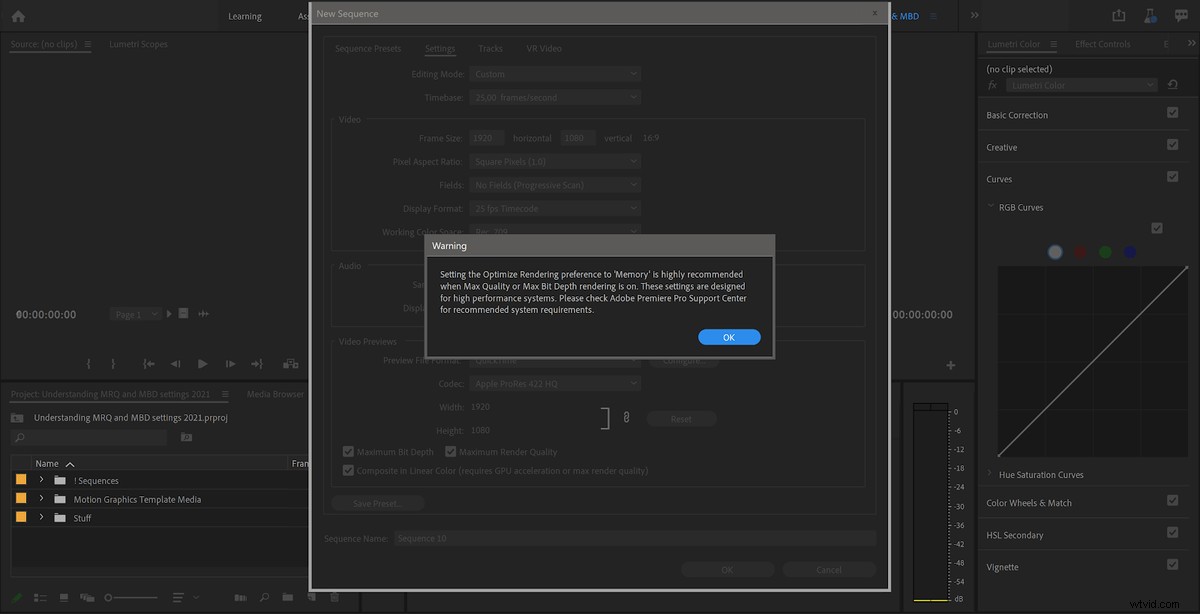
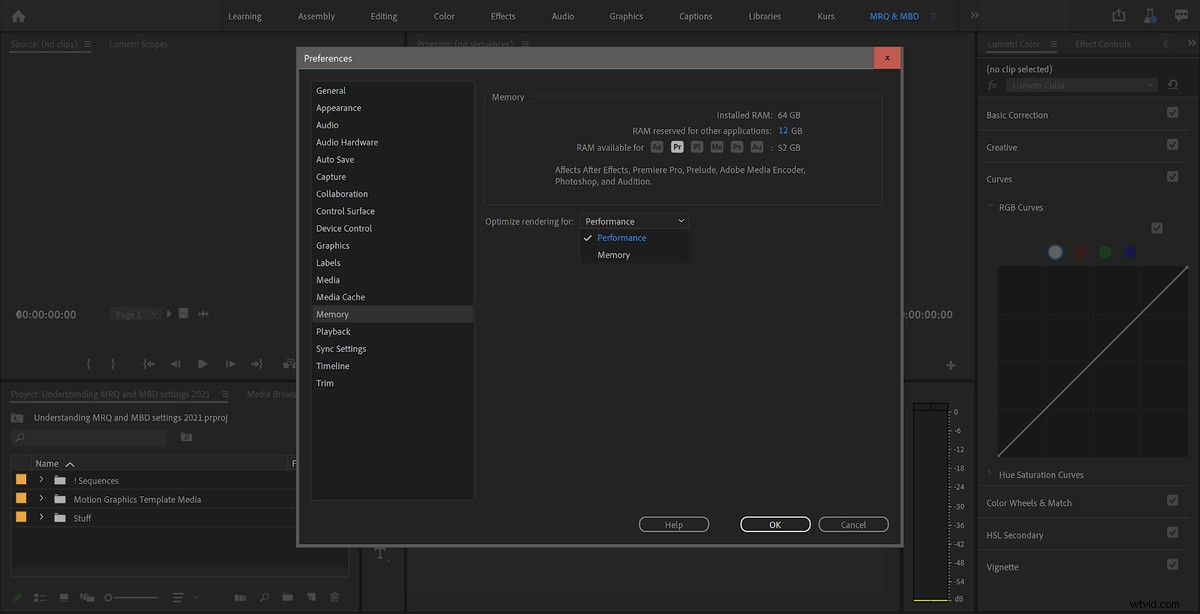
Dit is niet zo eng als het lijkt. Maar als u denkt dat dit een reden tot bezorgdheid is, kunt u naar de Voorkeuren voor geheugen gaan en deze instellen op Rendering optimaliseren voor geheugen . Of negeer het bericht helemaal, denkend "Ik heb veel RAM", zoals de meesten van ons doen. Tenzij je een high-end computer hebt met een superhoog aantal cores, zou je met deze instellingen geen geheugengerelateerde problemen moeten tegenkomen. Ik heb mijn geheugenvoorkeuren altijd ingesteld op Rendering optimaliseren voor prestaties .
Hoewel de waarschuwing zegt dat het "sterk aanbevolen" is om dit in te stellen op Geheugen , hebben sommige gebruikers gemeld dat dit hun systemen minder zal maken stal. Ik laat deze instelling op de standaardwaarde staan, namelijk Prestaties .
Wat doet de maximale bitdiepte?
Op het eerste gezicht lijkt het erop dat de Maximale bitdiepte switch dwingt Premiere Pro simpelweg om ondersteunde effecten in 32-bit weer te geven met een zwevende-komma-nauwkeurigheid. Dit is goed omdat het banding en andere artefacten vermindert, terwijl overbrights en superzwarten intact blijven en nooit niveaus worden afgekapt.
De schakelaar voor maximale bitdiepte vraagt ook 32-bits float van de importeur, die anders slechts 8-bits is.
Wat zegt Adobe?
Dit is de uitleg die Premiere Pro u biedt wanneer u de aanwijzer boven de Render op maximale diepte houdt knop in de Exportinstellingen.
"Rendering met maximale bitdiepte verbetert de kwaliteit van de video, maar verhoogt de duur van het coderen."
Dit kan verwarrend zijn. Wat doet 'Verbetert de kwaliteit van de video' gemeen? Deze uitleg is ook niet het volledige plaatje:dat doet het niet noodzakelijk verhoog de coderingstijd . Hierover later meer.
Om de een of andere reden is er geen tooltip voor Render op maximale diepte in Premiere Pro 15.0, dus je wordt overgelaten aan je eigen interpretatie daarvoor.
Waarom maakt het uit?
Laten we eerst eens kijken naar de weergave van videoframes. Dit kan in 8-bit per kanaal, of in 32-bit per kanaal. Als je GPU-rendering (CUDA, Metal of OpenCL) hebt gekozen in de projectinstellingen, wordt dit altijd in 32-bits gedaan, tenzij je effecten hebt gebruikt die niet GPU-versneld zijn.
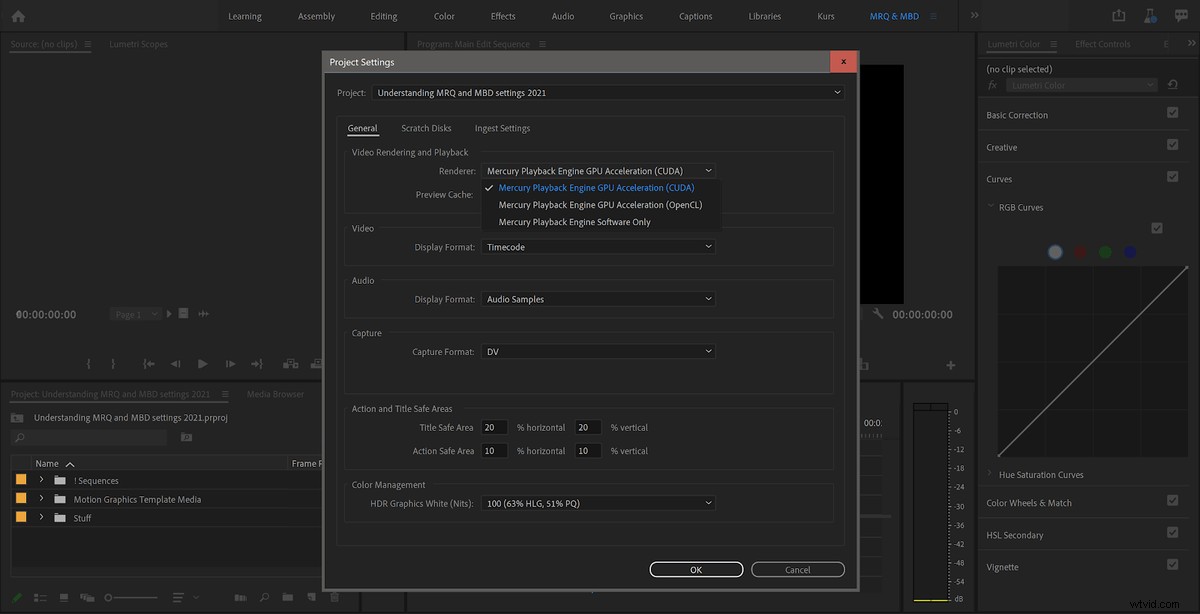
Als Alleen Software is gekozen in de Projectinstellingen, hangt de bitdiepte af van de Render op maximale diepte schakelaar. Als het is ingeschakeld, wordt het renderen in 32-bits uitgevoerd. Zo niet, dan wordt het in 8-bit gedaan.
8-bit betekent dat het resultaat van elke berekening op het beeld slechts 256 mogelijke niveaus per kanaal kan hebben (RGB of YUV). Dat is niet veel nauwkeurigheid. Met meerdere effecten op een clip betekent dit dat we afrondingsfouten krijgen voor elke berekening, met het gevaar van banding en blokkering.
In 32-bit doen we alle berekeningen met resultaten die meer dan 4 miljard verschillende niveaus per kanaal kunnen hebben, dus afrondingsfouten met meerdere effecten worden volledig geëlimineerd. We kunnen ook niveaus opslaan die veel verder gaan dan 100% wit en 0% zwart.
Hier is een goede test om te doen als je het verschil wilt zien tussen 32-bits en 8-bits weergave. Gebruik een clip met enkele highlights die het maximum benaderen.
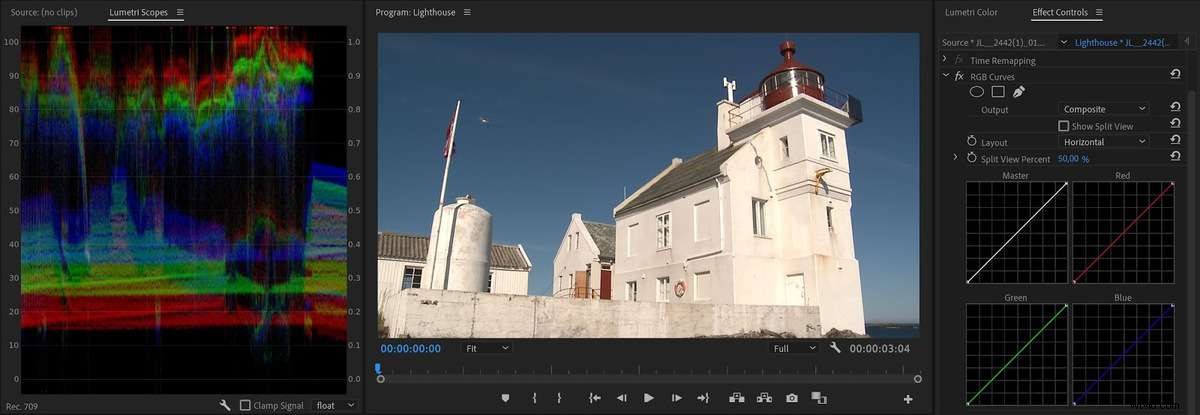
Gebruik het oude vertrouwde (en verouderde) RGB Curves-effect om niveaus te forceren die veel verder gaan dan 100% wit. (Je kunt Lumetri Color hiervoor niet gebruiken, omdat het de niveaus vastklikt wanneer ze worden gestapeld.)
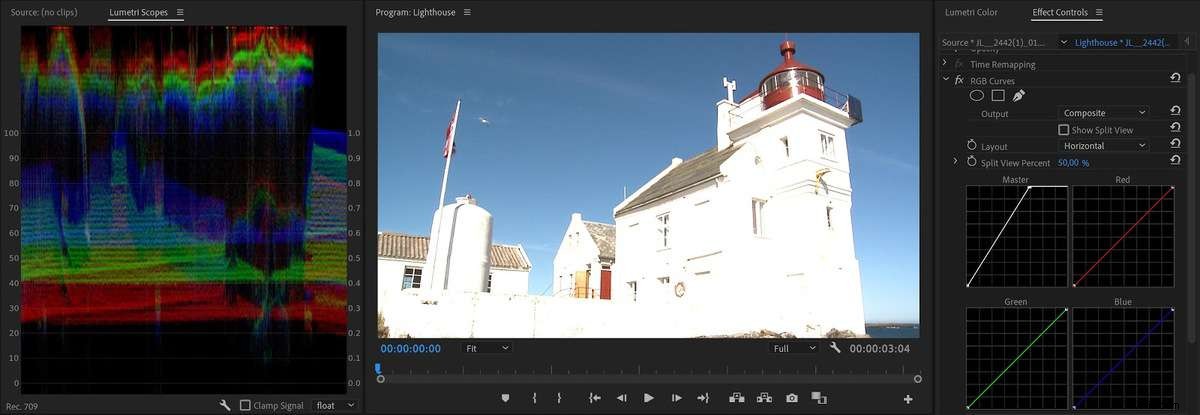
Laten we nu nog een instantie van RGB-curven toevoegen, waarbij we het wit weer ver naar beneden slepen.
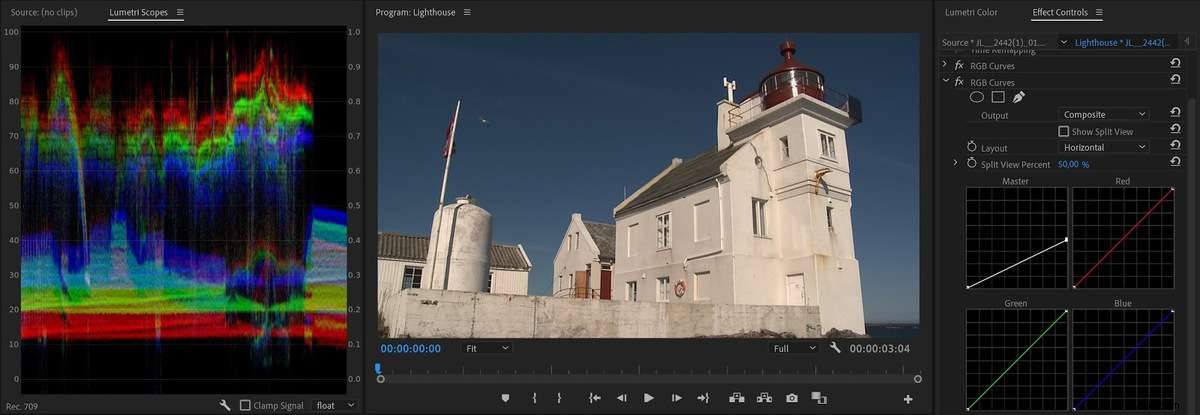
Omdat we renderen in 32-bits met behulp van de GPU, werden de overbrights niet afgekapt en ziet het beeld er normaal uit. Laten we nu overschakelen naar Alleen software in de projectinstellingen en kijk wat we krijgen.
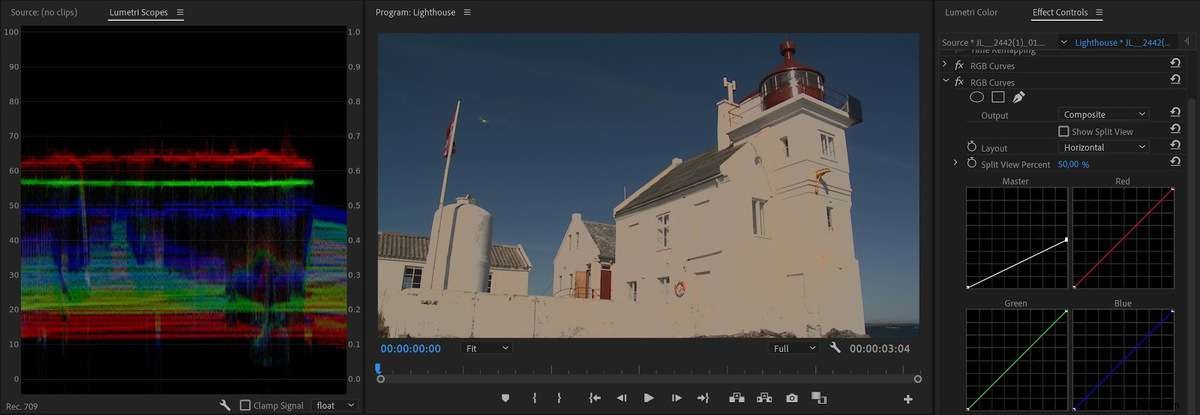
Rendering in 8-bits, de overbrights werden eenvoudigweg geknipt, en het opnieuw verlagen van de niveaus maakt de geknipte niveaus alleen maar donkerder. Veel details gaan verloren.
Laten we nu de Maximale bitdiepte activeren schakel de volgorde-instellingen in.
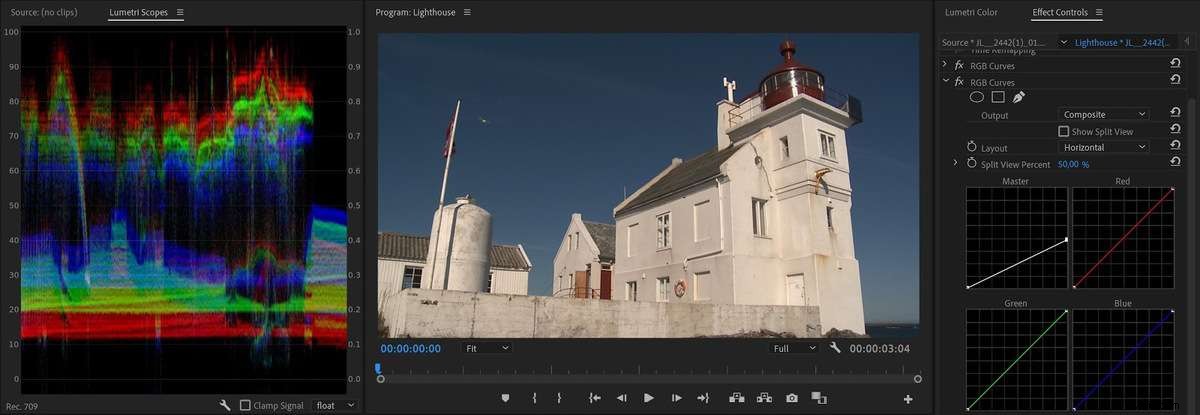
Dat is bijna identiek aan het resultaat dat we kregen met GPU-rendering. Dus als u in de softwaremodus werkt, moet u zeker vink dat vakje aan voor maximale bitdiepte .
Natuurlijk waren dit extreme aanpassingen om het verschil duidelijk te maken. Normaal zou je dit niet doen. Maar we hebben vaak meer dan één aanpassing op één clip. U kunt bijvoorbeeld een LOG toevoegen aan Rec.709 LUT als een bronclipeffect, vervolgens de afbeelding in de tijdlijn normaliseren en vervolgens een aanpassingslaag toevoegen met een look.
Dat zijn drie aanpassingen op één clip, en alle tussenliggende niveaus die boven de 100% gaan, worden in 8-bits geknipt, waardoor details verloren gaan. U kunt ook strepen gaan zien in verlopen enz. Zorg ervoor dat u in 32-bits rendert, en deze problemen zijn niet aanwezig.
Hoe weet je of een clip wordt weergegeven in GPU-modus of Software Only-modus?
Als je GPU-versnelling (CUDA, Metal of OpenCL) hebt geactiveerd in Projectinstellingen, is het redelijk om aan te nemen dat je altijd het beste algoritme krijgt. Maar dat is niet altijd het geval, en het is complexer dan het op het eerste gezicht lijkt.
Als Alleen software is gekozen in Projectinstellingen, krijgt u uiteraard Software-rendering. Maar zelfs als u GPU-rendering kiest in de projectinstellingen, kunnen sommige van uw clips worden weergegeven in de softwaremodus . Voeg een niet-versneld effect of overgang toe en een deel van de weergave van elk frame wordt gedaan in 8-bits, mogelijk clippingniveaus en afrondingsfouten en banding.
Dergelijke niet-versnelde effecten omvatten veelvoorkomende tools zoals Camera Blur en Onscherp masker . Deze zijn niet geschreven voor de GPU en moeten worden berekend op de CPU.
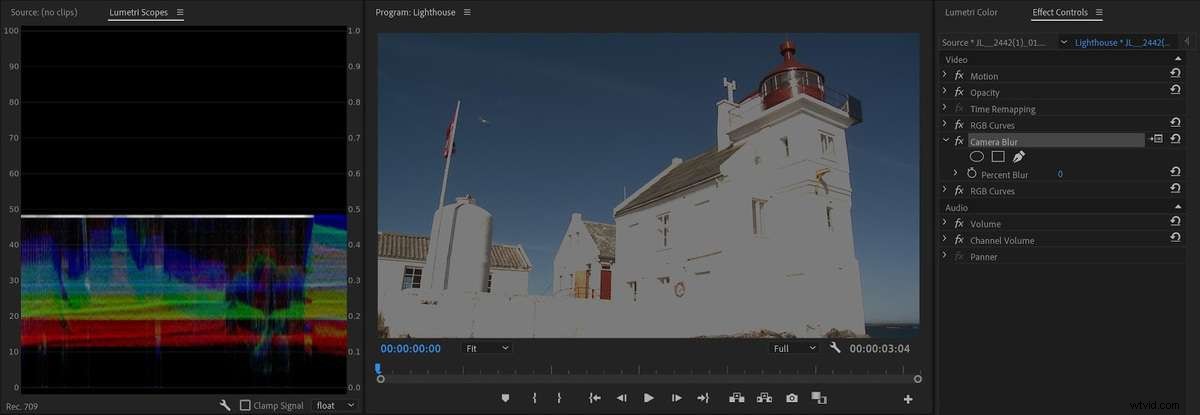
Pas op voor de rode weergavebalk
De renderbalk kan u enkele aanwijzingen geven over wat er aan de hand is. Gebieden van de tijdlijn zonder weergavebalk hebben geen effecten, dus wat u ziet, zou moeten zijn wat u krijgt. Als je GPU-rendering hebt gekozen in Projectinstellingen en je ziet een gele renderbalk in de tijdlijn, dan weet je ook dat je zeker in GPU-modus bent en je bent veilig.
Een rode weergavebalk is vaak een teken dat u rendert in de softwaremodus , maar het is geen duidelijke identificatie. Het kan er ook op wijzen dat u een GPU-versneld effect gebruikt dat moet worden weergegeven, zoals Optical Flow frame blending voor Speed, of de Morph Cut overgang. Ja, die moeten worden weergegeven - vandaar de rode renderbalk - maar ze worden in 32-bits op de GPU weergegeven. Dus een rode weergavebalk is niet altijd betekent dat u zich in de softwaremodus bevindt.

Het blijkt dat er geen eenvoudige of directe manier in de tijdlijn is om te zien of een deel van uw weergave in de softwaremodus is uitgevoerd. Dus, hoe kom je erachter of een clip die een rode renderbalk activeert, dit doet vanwege softwarerendering of niet?
Eerst moet je uitzoeken of de clips in het gebied met een rode renderbalk effecten op hen hebben. Dat is het gemakkelijke deel. Als de fx badge grijs is, zijn er geen effecten op de clip. Als het geel is, zou je ook goed moeten zijn, want dat betekent dat alleen de vaste effecten (Beweging, Dekking etc.) zijn gewijzigd.
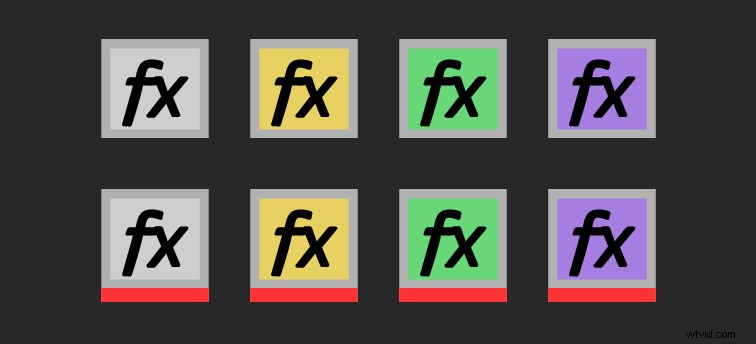
Als er een rode lijn onder de badge staat, heeft deze een Bronclip-effect en als deze paars is, hebt u een effect toegevoegd aan de clip in de tijdlijn. Als het groen wordt, betekent dat dat je een effect hebt gebruikt en dat je ook een of meer van de vaste effecten hebt gewijzigd. De korte versie hiervan is dat je je alleen zorgen hoeft te maken over clips met groen en paars badges, en die met een rode lijn onder de badge.
U kunt het deelvenster Effectbediening controleren om te zien of een van uw clips een niet-GPU-effect heeft. Als de clips alleen GPU-versnelde effecten hebben, zit je goed. Als een of meer clips een niet-versneld effect hebben, worden sommige berekeningen op de CPU gedaan.
Als je niet weet welke effecten GPU-versneld zijn, kun je erachter komen door naar de Legosteenpictogrammen in het deelvenster Effecten te kijken.
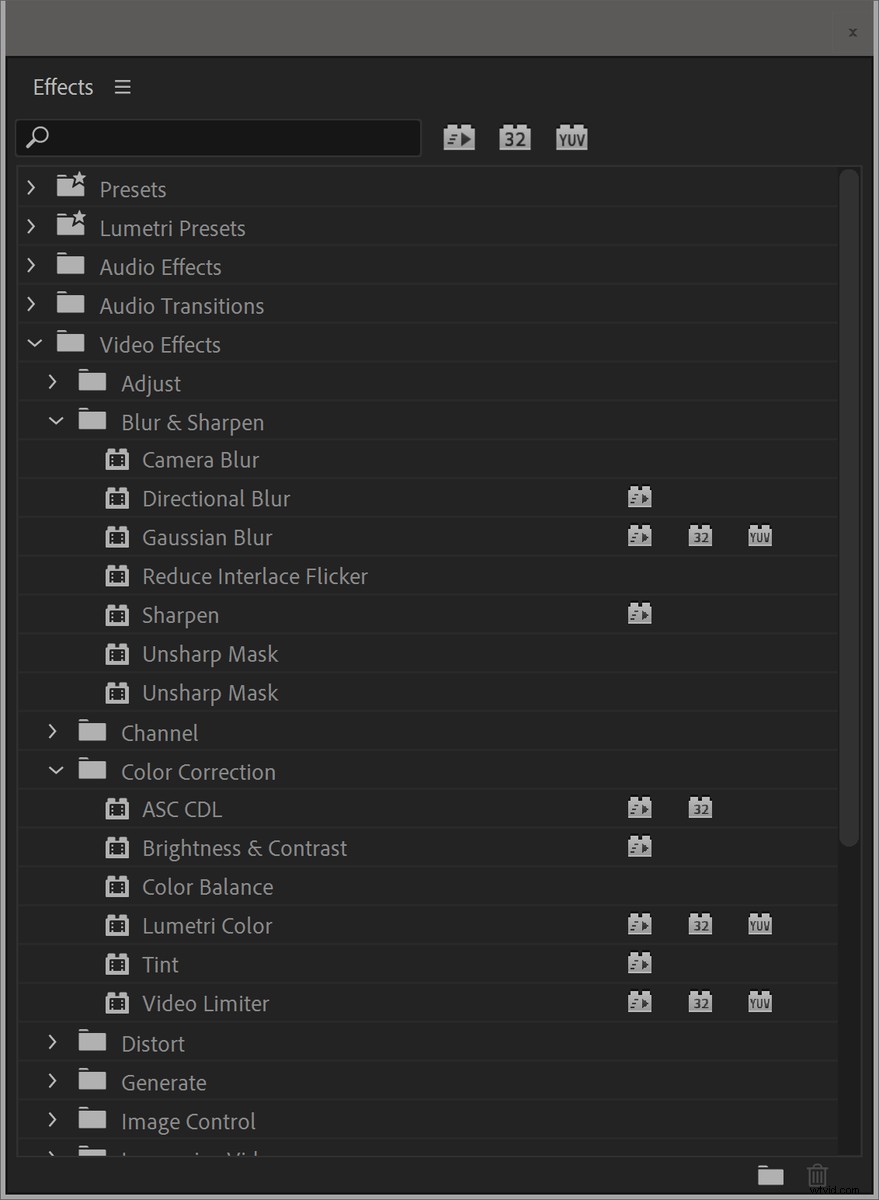
Maar het deelvenster Effectbediening toont slechts effecten op één clip tegelijk, dus het duurt even om alle clips te doorlopen. Hier is een snellere manier om alle effecten op al die clips te zien:Selecteer de clips die u wilt inspecteren en klik op Bewerken> Attributen verwijderen . Dit toont alle effecten die op die clips zijn gebruikt.
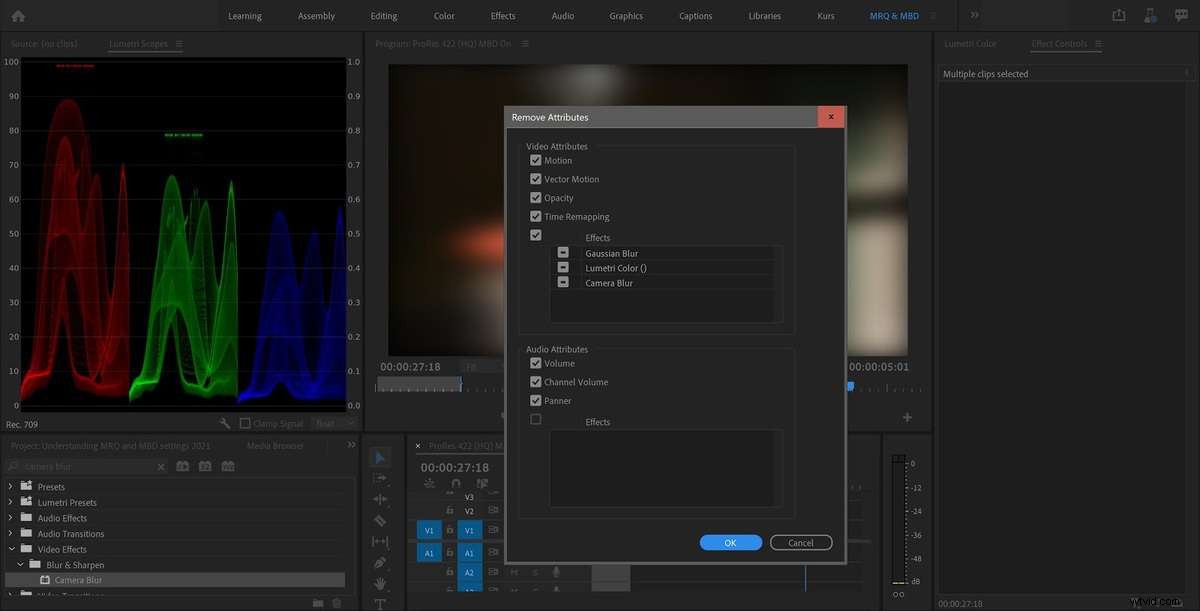
Het laat niet zien welke clip welk effect heeft, maar je kent je tijdlijn waarschijnlijk goed genoeg om een goed idee te hebben van wat waar is gebruikt.
Hoe zit het met voorbeeldweergaven?
Uw sequentie-instellingen hebben normaal gesproken geen invloed op uw uiteindelijke export, omdat het deelvenster Exportinstellingen zijn eigen instellingen heeft voor maximale bitdiepte.
Als u van plan bent om voorbeeldweergaven voor export te gebruiken, zult u blij zijn te horen dat het instellen van het voorbeeldbestandsformaat op zoiets als ProRes 422 HQ uw voorvertoningen zal decoderen en weergeven in 10-bits, zelfs wanneer de reeks de maximale bitdiepte heeft ingesteld op uit. Het is dus altijd veilig om voorbeeldweergaven van hoge kwaliteit te gebruiken.
Dit is een goede zaak, maar het betekent ook dat je een zichtbare verandering in de afbeelding ziet onder video-overlays, zoals lagere tertsen als je dat deel van de tijdlijn rendert met de maximale bitdiepte ingesteld op uit in je sequentie-instellingen.
Maximale bitdiepte beïnvloedt het decoderen van sommige formaten
De schakelaar Maximale bitdiepte vraagt ook 32-bit float van de importeur, die anders slechts 8-bit is. Dus een weinig bekend feit is dat MBD ook invloed heeft op de manier waarop sommige videoformaten worden geïmporteerd/gedecodeerd . Dit betekent dat het sommige video-indelingen meer kan beïnvloeden dan andere, zelfs als u zich in de GPU-versnellingsmodus bevindt.
Voor sommige formaten, zoals ROOD, is dit vereist om HDR-pixels te krijgen. RED RAW is bijvoorbeeld 12-bits, en Maximum Bit Depth kiest tussen het decoderen van de frames op 8-bits versus het gebruik van de volledige 12-bits.
Er is geen lijst met deze indelingen, maar redacteuren die ProRes gebruiken, moeten weten dat zonder MBD-set, ProRes wordt gedecodeerd in 8-bits , ook al is de ProRes-bron altijd 10-bits of meer.
Dus als je deze schakelaar niet hebt ingeschakeld in de Sequentie-instellingen, zullen je glorieuze ProRes-beelden waarschijnlijk strepen vertonen in de Program Monitor en in de Lumetri Scopes.
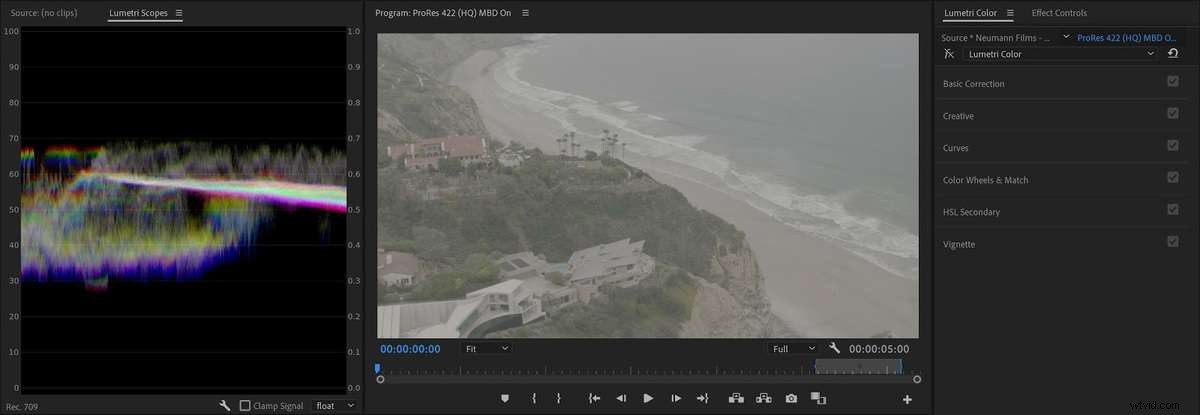
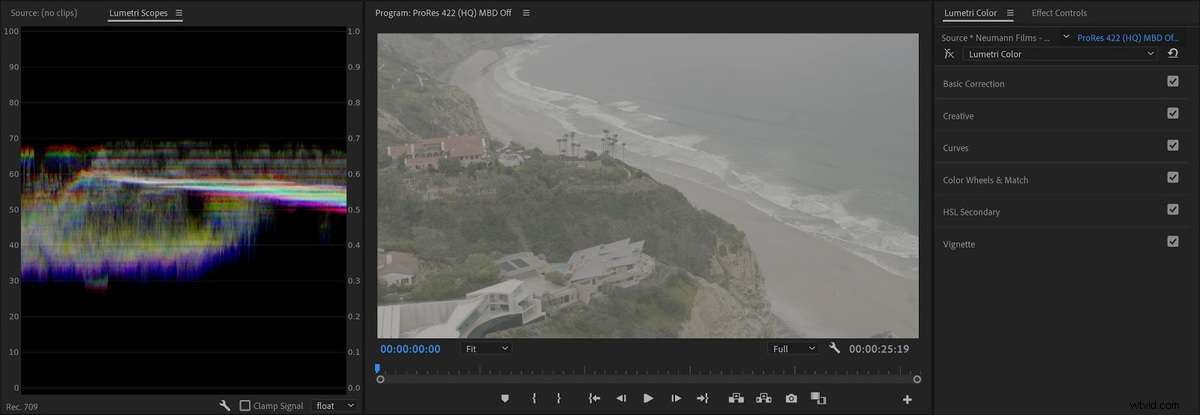
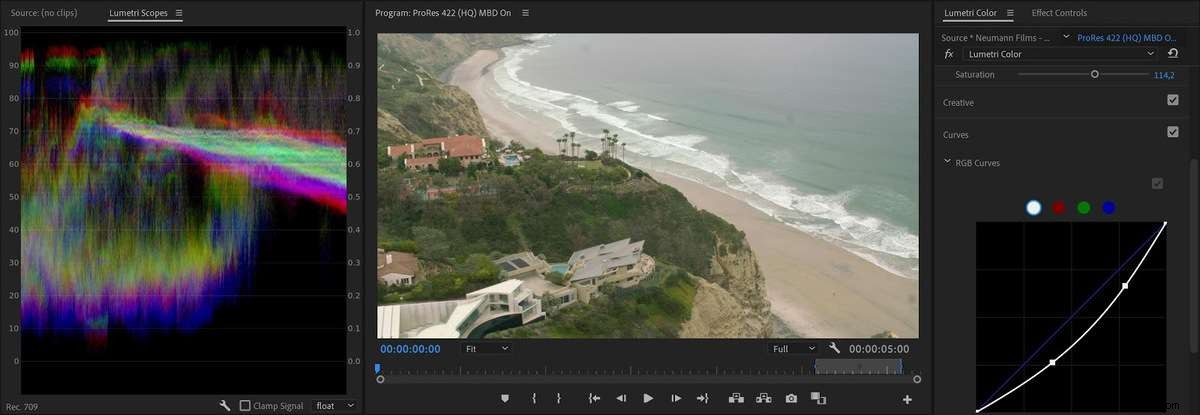
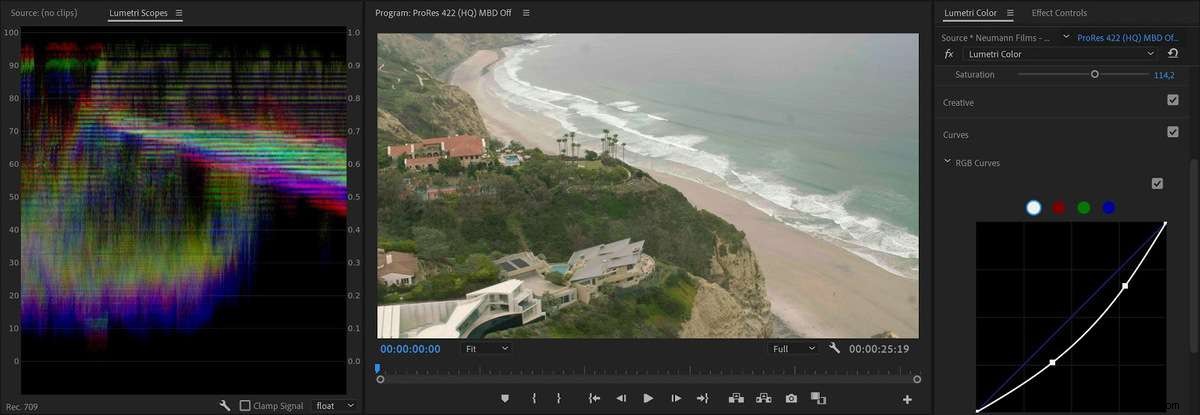
Als de maximale bitdiepte niet is ingesteld, wordt ProRes gedecodeerd in 8-bits.
Dus als u wilt dat uw programmamonitor iets laat zien dat lijkt op de uiteindelijke uitvoer terwijl u kleurcorrectie uitvoert, moet u zeker de maximale bitdiepte inschakelen in de reeksinstellingen.
De vaak over het hoofd geziene dieptekeuze in Exportinstellingen
Verwar de Render op maximale diepte niet instelling met de Diepte instelling die er direct onder wordt weergegeven in Exportinstellingen voor sommige indelingen. De weergave op maximale diepte aankruisvak verwijst naar de nauwkeurigheid van de berekeningen, terwijl de instelling voor Diepte hieronder verwijst naar de bitdiepte van de codering.
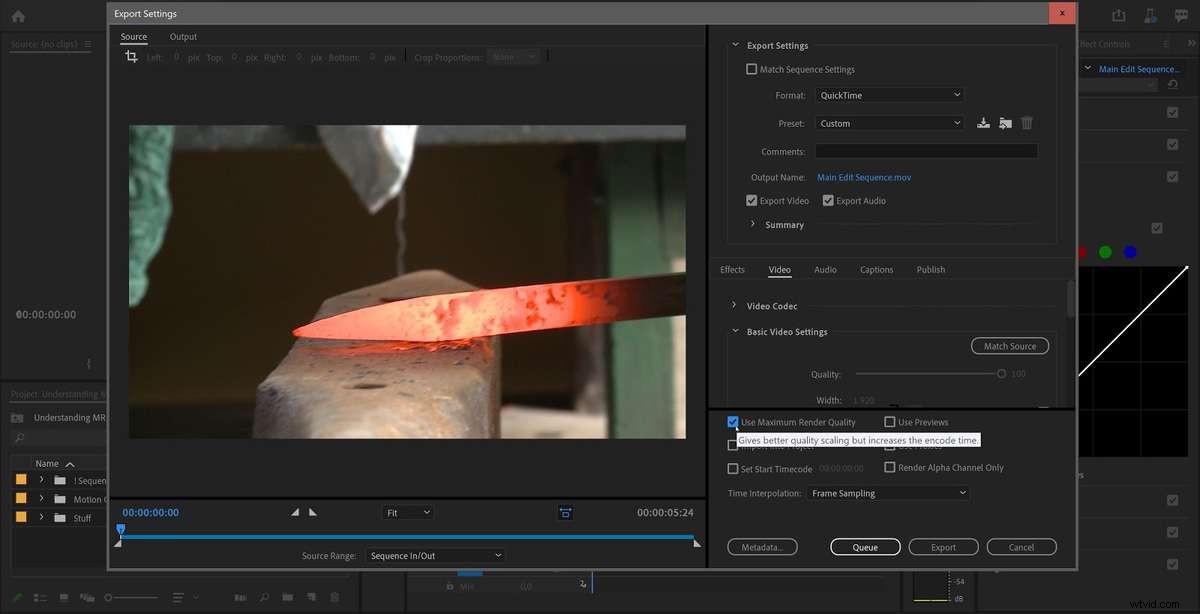
Dus de Diepte instelling bepaalt of het gerenderde bestand 8-bits video, 10-bits of meer zal hebben. Dus zelfs met Render op maximale diepte aangevinkt, zodat de berekeningen in 32-bits worden uitgevoerd, exporteert u in feite naar 8-bits video als u dit niet instelt op 16-bits!
Gebruik altijd 16-bits diepte bij het exporteren naar ProRes om uitvoer van hoge kwaliteit te garanderen
Om de een of andere vreemde reden zijn alle voorinstellingen standaard ingesteld op 8-bits - vermoedelijk een keuze voor prestatie boven kwaliteit - maar dit laat je open voor banding en blokkering.
Aangezien de 8-bits versus 16-bits waarde niet zichtbaar in het bestand wordt opgeslagen, zal het 8-bits bestand net doen alsof het 10-bits is voor alle smaken van ProRes 422 en 12/16-bits in ProRes 4444. Dit zal weergegeven in Eigenschappen in Premiere Pro en in software zoals MediaInfo.
Het liegt tegen je.
Merk op dat wanneer Smart Rendering van start gaat, deze instelling geen effect heeft. Maar als je een overlay hebt zoals een tekstlaag, of als je effecten zoals Lumetri hebt toegevoegd, zal Premiere Pro in 8-bit exporteren als Diepte niet is ingesteld op 16-bit. Als u voorvertoningen van het segment hebt weergegeven en Voorvertoningen gebruiken kiest, heeft de instelling geen invloed op de uitvoer.
Houd er ook rekening mee dat de Instellingen voor matchreeks functie in Exportinstellingen is ingesteld op Maximale bitdiepte als dit is ingeschakeld voor uw reeks, maar de diepte is ingesteld op 8-bit, waardoor zelfs deze functie onbruikbaar is voor hoogwaardige ProRes-export.
Wat doet Max Render Quality?
MRQ, indien actief, geeft u scherpere afbeeldingen na het schalen omdat het een Lanczos van hogere kwaliteit mogelijk maakt interpolatiemethode in plaats van de standaard bilineaire. Dit is de reden waarom het ook de exporttijd verhoogt wanneer het actief is.
Klinkt vrij eenvoudig. Maar heeft het invloed op andere zaken dan schaalvergroting? Zeker weten. En naar wat voor soort algoritmen kijken we hier?

OK, maar wat betekent "Beter schalen" precies?
Om deze vraag te beantwoorden, laten we Premiere Pro voorlopig verlaten en in plaats daarvan naar Photoshop kijken. Je hebt misschien gezien dat Photoshop verschillende schaalalgoritmen heeft om uit te kiezen. Bicubisch, Bicubisch Scherper, enz. En ze hebben allemaal verschillende voor- en nadelen.
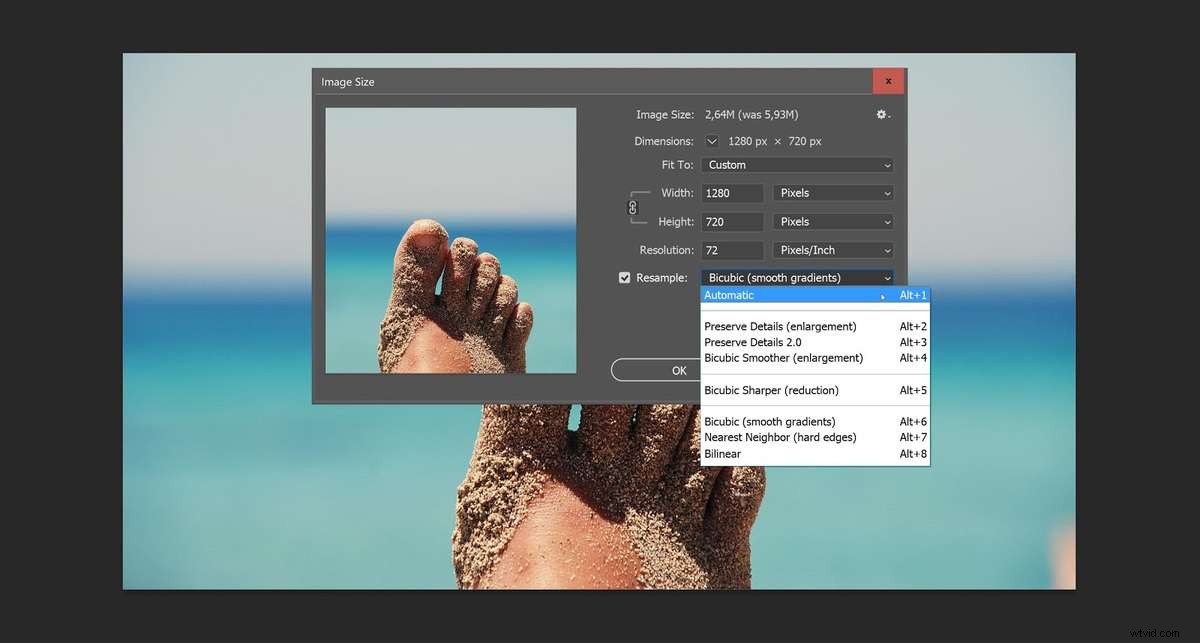
Waarom hebben we er zoveel om uit te kiezen? Want scherp is niet altijd wat je wilt. Sommige algoritmen zijn beter voor grafische elementen en tekst, terwijl andere beter zijn voor "natuurlijke afbeeldingen". Sommige werken beter bij het opschalen, terwijl andere beter werken bij het verkleinen. Colin Smith van PhotoshopCAFE heeft een goede uitleg in zijn video-tutorial.
Terug naar Premiere Pro, en "beter" is schijnbaar gelijk aan scherper. Dus dat is de eerste enigszins onnauwkeurige verklaring in die tooltip-tekst. De tweede onnauwkeurigheid is dat het alleen Schalen vermeldt, ondanks dat het feitelijk alle Transform-opties beïnvloedt, inclusief Schaal, Positie en Rotatie—plus alle effecten die Schalen, Positie en Rotatie doen, zoals de Warp Stabilizer .
Net als de uitleg voor Max Bit Depth is ook de uitleg in de tooltip fout:het is niet noodzakelijk verhoog de coderingstijd. Als GPU-versnelling is ingeschakeld, wordt de coderingstijd niet verlengd. Zie test 7
Wanneer begint het?
Als je alleen GPU-versnelde effecten hebt gebruikt en een gele weergavebalk op de tijdlijn hebt, of helemaal geen balk, zal dit niet kick in, want de GPU-schaalalgoritmen zijn nog beter - en toch sneller - omdat ze op de GPU worden uitgevoerd.
Als de weergavebalk rood is, mogelijk kick in. Hoogstwaarschijnlijk zal het dat doen, omdat je een niet-versneld effect hebt gebruikt. Maar er zijn enkele uitzonderingen. Net als de optie Max Bit Depth, zal Max Render Quality niet kick in als de renderbalk rood is omdat je morph cut hebt gebruikt en nog niet hebt gerenderd. Die overgang wordt weergegeven op de GPU, dus MRQ treedt niet in werking.
En onthoud:het heeft invloed op Transformaties (hoewel het alleen schalen vermeldt in de exportinstellingen). Dus als je niets hebt geschaald, verplaatst of geroteerd, zal het zijn ding niet doen. Als je Positie, Rotatie of Schaal hebt aangepast of keyframed (inclusief Schaal of Instellen op Framegrootte), heb je deze algoritmen mogelijk geactiveerd.
Aan de andere kant schaalt u misschien zonder het te beseffen. Bijvoorbeeld Warp Stabilizer introduceert schalen, roteren en herpositioneren. En als je standaard Instellen op framegrootte hebt gebruikt , schaalt u misschien zonder het te weten. Natuurlijk, als je output uitvoert naar een andere grootte dan je reeks (bijvoorbeeld HD exporteren van een 4k-tijdlijn), dan ben je zeker zijn schalen.
Enkele feiten die je misschien zullen verbazen
Zoals je hebt gezien, is het niveau van complexiteit verrassend hoog voor zo'n eenvoudig doel:geef me de output van maximale kwaliteit. Het is niet alleen ingewikkeld, maar de verschillende instellingen zijn in verschillende hoeken van de software geplaatst - en ze moeten allemaal correct worden ingesteld.
Velen van ons zullen moeite hebben om al deze instellingen te vinden, te begrijpen en correct toe te passen.
Maar er is meer. Hier is wat informatie die je misschien wel of niet zal verbazen.
Premiere Pro heeft verschillende schaalalgoritmen
Adobe beschreef hoe en wanneer de verschillende schaalalgoritmen werken in een blogpost uit 2010.
Hier is een overzicht dat ik heb gemaakt, bijgewerkt met de algoritmen die worden gebruikt voor Afspelen van hoge kwaliteit , wat in 2010 niets was.
| Algoritme | Beschrijving | Wanneer wordt het gebruikt? |
| Dichtbijzijnde | Supersnel, maar hoekig | Voor sommige formaten wanneer u de afspeelresolutie verlaagt in de Programmamonitor. |
| Bilineair " data-order="Bilineair ">Bilineair | Zeer snel, maar niet de beste kwaliteit. | Wordt gebruikt voor afspelen wanneer afspelen met hoge kwaliteit niet is ingeschakeld. |
| Gaussian low-pass gesampled met bilineaire" data-order=" Gaussiaanse low-pass gesampled met bilineair">Gaussian low-pass gesampled met bilineair | Snel, maar een beetje zacht. | Wordt gebruikt wanneer u exporteert in de softwaremodus met Max Render Quality uitgeschakeld. Wordt ook gebruikt in de softwaremodus wanneer het afspelen is gepauzeerd. |
| bicubisch " data-order=" Variabele-radius bicubisch ">Variabele-radius bicubic | Langzaam, maar scherper. Vergelijkbaar met de standaard bicubische modus in Photoshop. | Wordt gebruikt voor export in softwaremodus wanneer Max Render Quality is ingeschakeld. |
| Lanczos 2 low-pass gesampled met bicubic. Ook beschreven als gewijzigd bicubisch met een schaalafhankelijk voorfilter." data-order="Lanczos 2 low-pass gesampled met bicubic. Ook beschreven als gemodificeerde bicubic met een schaalafhankelijk voorfilter.">Lanczos 2 laagdoorlaat bemonsterd met bicubic. Ook beschreven als gemodificeerd bicubisch met een schaalafhankelijk voorfilter. | Het beste allround schalingsalgoritme. Behoorlijk geavanceerd, maar omdat het alleen beschikbaar is in GPU-modus, is het nog steeds snel. | Gebruikt in GPU-modus voor export en wanneer het afspelen is gepauzeerd. Wordt ook gebruikt in GPU-modus wanneer afspelen met hoge kwaliteit is ingeschakeld. |
You don’t normally see full quality in the program monitor
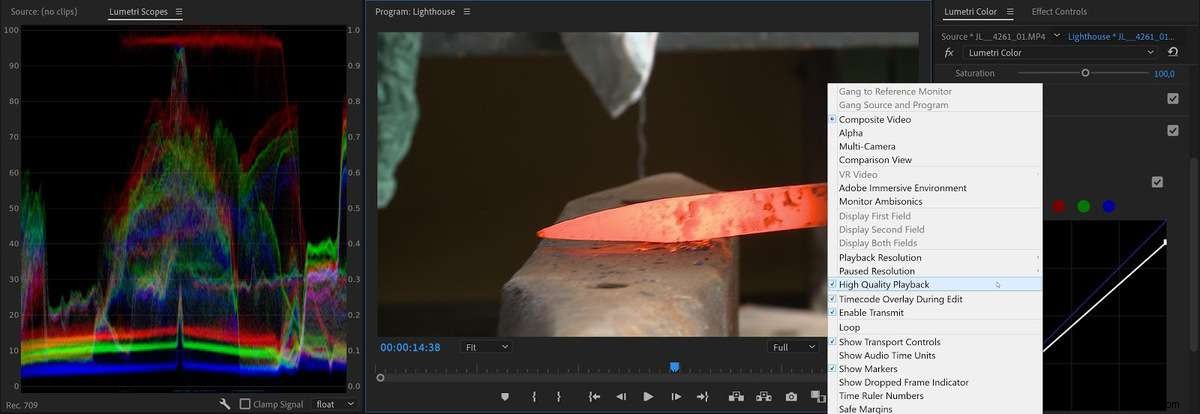
As you can see in the table above, Premiere Pro uses a fast, lower-quality algorithm for Playback by default. This makes playback less demanding and may be the only workable choice on less capable systems. To see what you’ll get on export, and accurately judge the results, you’ll have to enable High Quality Playback in the Program Monitor settings menu.
With High Quality Playback enabled, Premiere Pro plays and scrubs the image using the same quality that’s used when the Playhead is paused. So you might find that your system struggles and starts dropping frames. In that’s the case, turn this feature off.
Your choices in Sequence Settings don’t matter that much
As we’ve seen (and to make things more complicated), both settings are available both in the sequence and in the export settings. If you take a look at the tests at the end of this article, you’ll see that your sequence settings have no impact on the quality of the exported file .
But if you want to know what you’re exporting, the sequence settings and the export settings have to match. If they’re set differently, the output won’t be the same as what you saw while editing. So I recommend that you keep MRQ and MBD settings matched.
Max Render Quality also affects the way color is rendered
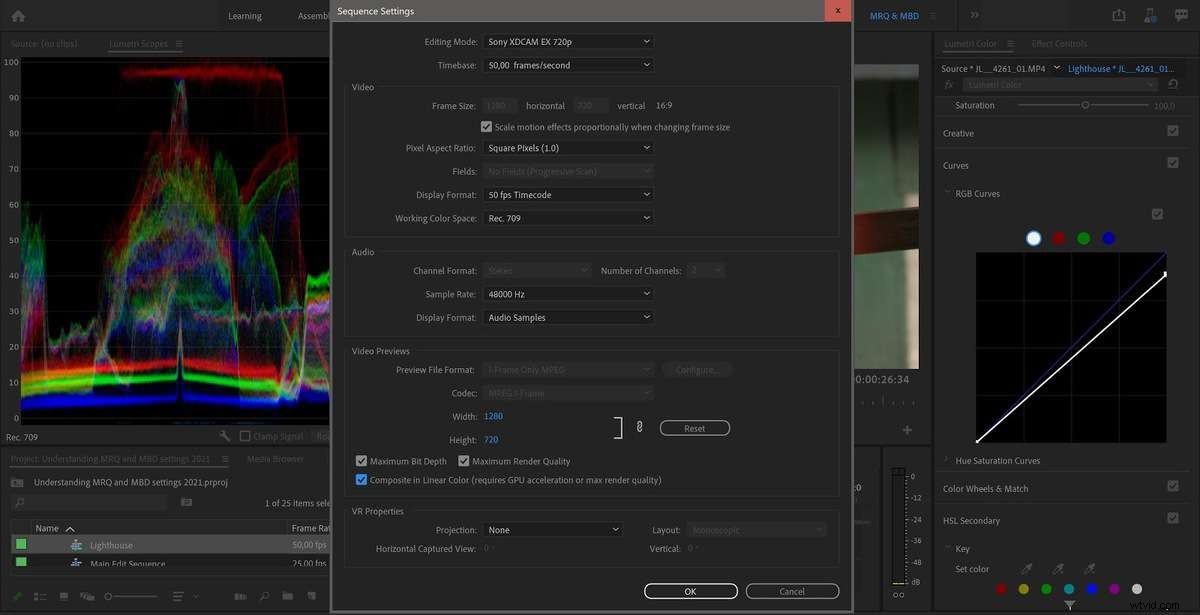
As you’ll see in the Sequence settings, the Composite in Linear Color setting depends on GPU acceleration or Max Render Quality. So if this is on, as it is by default, activating Max Render Quality will also activate Composite in Linear Color when you’re in Software mode. And this will affect how your compositing, cross-dissolves, and color grading will look.
In Software mode, this also makes Premiere Pro blend in linear color for frame blending when you change Speed/Duration.
Max Render Quality affects how some formats are decoded
As we’ve seen, the Max Render Quality setting normally has no impact on our exports in GPU mode, because a superior scaling algorithm will be used on the GPU. But even with GPU rendering, MRQ can improve quality when working with footage that supports fractional resolution (Wavelet codecs, like RED for example), using full-resolution sources instead of a fractional resolution for the export when the image has been scaled down. See Test 14.
According to engineers and developers from Adobe, MRQ affects decisions made by RED, PNG, JPEG, HIEC, HIEF and WEBP importers. And they mention that this list will change over time, as well as what impact MRQ has on them.
Common Misconceptions
There are some statements that you’ll often see in forums, books and articles—even by Adobe evangelists—that don’t hold up to scrutiny. So let’s clear these up.
“Maximum Render Quality only affects scaling”
There are many versions of this misconception, but it usually goes a bit like this.
“Using Maximum Render Quality will not help unless you’re scaling up or down”.
Wrong . It also kicks in if you’re changing Rotation, Position, and other Transforms, or the Warp Stabilizer, which also does some scaling and other Transforms. But it only affects Software rendering. See Test 9
“Maximum Bit Depth doesn’t help if your source or destination file is 8-bit”
Since a lot of source files are 8-bit and we often export to 8-bit codecs, people tend to think that we don’t have to render effects in 32-bit. Here are two common statements.
“You don’t have to check Maximum Bit Depth, because H.264 and YouTube is 8-bit anyway.”
“You don’t need Maximum Bit Depth if your source material is 8-bit.”
Wrong. Even when the source and export are 8-bit, doing the decoding and all the internal calculations at 32-bit accuracy will make sure your consecutive adjustments (say, Lumetri on the source clip and a LUT or tweak on an added Adjustment Layer) don’t introduce clipping, banding and posterization.
This affects both GPU rendering and Software rendering, as you can see in Tests 3, 4 and 5.
Unfortunately, none of the presets in the new Quick Export have Maximum Bit Depth set. So, to get less banding and blocking when exporting using the standard export method, choose the same preset, you should activate MBD.
“When you have GPU acceleration enabled, the settings don’t matter”
This is true for MRQ, but only if your timeline does not have a red render bar due to non-accelerated effects, which forces you into Software rendering. For Max Bit Depth, it’s only true if you haven’t added any effects. See Test 3, 4, 7 and 8.
“The export will match what you see in the program monitor”
Not entirely true. To get WYSIWYG in the Program Monitor during playback, not just when playback is paused, you’ll have to enable High Quality Playback in the program monitor panel menu.
Effects and transitions like Morph Cut and Optical Flow need to be rendered to see the actual result. Also, when you’re rendering previews, you’ll need to render to a good codec, or else the result will not match your output.
If it’s rendered to the default I-frame Only MPEG-2 codec, you’ll get a bad preview compared to ProRes, DNxHR or CineForm codecs, which provide better-quality previews.
So it’s best to use codecs that are so good you can use them for export, enabling Use Previews in the export settings. Ideally, you should use the exact same format as you’ll use when you export your master file to get super-fast Smart Rendering and eliminate re-transcoding.
Render Previews if you’re editing in Software mode. During playback in Software mode, you’ll not get 32-bit rendering. Effects and compositing can look very different before and after rendering.
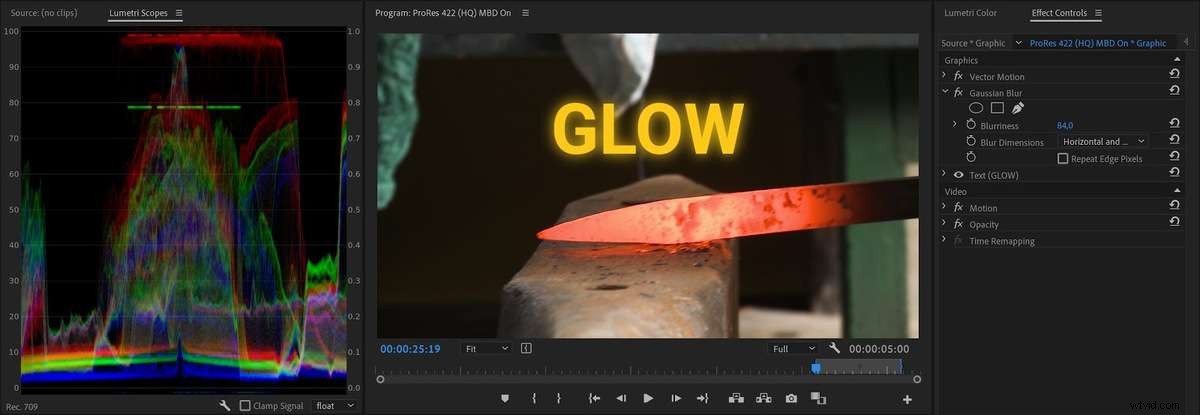
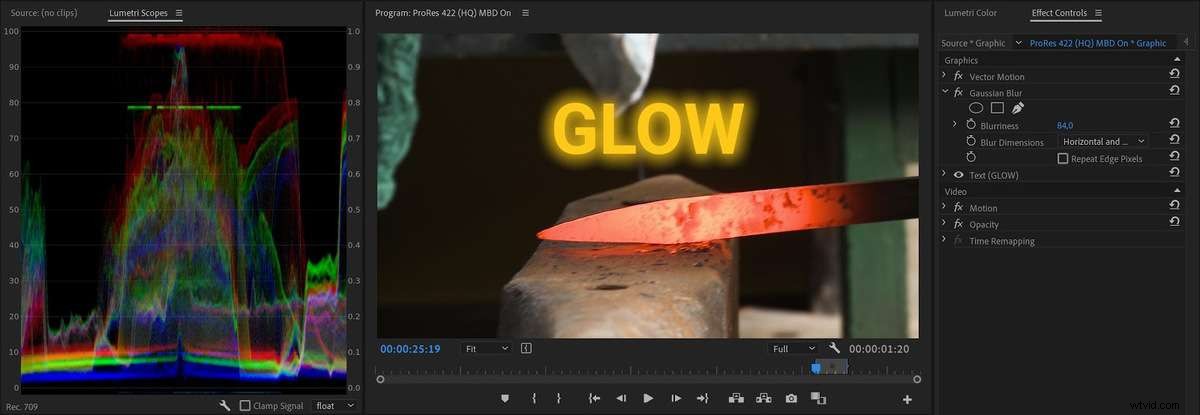
For example, graphics might get jagged edges during playback, and Linear compositing won’t be applied, which changes the look of blending modes, etc. By rendering your previews, you’ll get to see them in full quality, which is useful if your system can’t handle High Quality Playback.
Summing up
These MRQ and MBD settings affect the video quality at three different stages in the pipeline. The importer/decoder can be 8-bit or 32-bit, the processing of effects and transforms can be done in 8-bit or 32-bit, and finally the exporter can render to 8-bit, 10-bit, 16-bit, etc.
As we’ve seen, where these settings really matter is in your Export settings. Both Max Render Quality and Max Bit Depth have an impact on your image quality, although Max Render Quality mostly only kicks in when you’re in Software mode (which is entirely possible even with GPU acceleration turned on, see Test 11).
It’s hard to be definitive, but in many (most?) cases, leaving the settings on will not affect the export time.
For some sources, MRQ can make a difference even in GPU mode. MBD in export settings can also affect how some formats are decoded, even in GPU mode, most notably ProRes.
And finally, you should always enable 16-bit Depth for formats where this choice is available.
Unfortunately, in both Sequence Settings and in Export Settings, the defaults don’t have these settings enabled, so you’ll have to intervene to get the best quality video in Premiere Pro. The Quick Export has none of these settings enabled, and there’s no way you can change it.
If you want good quality video, always enable Maximum Bit Depth and Maximum Render Quality, and choose 16-bit instead of 8-bit for formats with a choice for Depth.
With all of this in mind, I recommend that you always have MBD and MRQ enabled in your export settings. If you want WYSIWYG, you should also enable both of them settings in your sequences. If your system struggles you may want to turn them off, and see if the exported files still meet your quality standards, knowing that it’s not top quality.
Most of the time, the settings will do nothing at all, but they will kick in when needed, and ensure the best possible quality.
Here’s what I do
You may be wondering what choices I have made, and how I set up my workflow. Here you go.
- I use Sequence Presets that have both settings activated
- The Sequence Presets use ProRes 422 HQ to get high-quality preview renders
- I’ve made a ProRes 422 HQ Export Preset with both settings activated
- The Export Preset also has Use Previews, and 16-bit Depth activated
The export to a master file is very quick if I’ve rendered parts of the timeline where there’s a red render bar, due to Smart Rendering (see Test 1 and 6). Of course, I don’t always have to render, but I sometimes render during breaks or when I’m on the phone, to save time on final export when Smart Rendering kicks in.
I also use Render &Replace for dynamic link comps, titles, MOGRTs etc.
For longer projects I will set up watch folders in Adobe Media Encoder to automatically take my exported master file and output the h.264 versions, using a preset with Maximum Bit Depth and Maximum Render Quality enabled. But for short-form projects I normally just queue these exports, which is fast and easy.
I hope the info in this article enables you to make qualified choices for these settings for future projects. This should enable you to improve your image quality and yield fewer surprises when you export your films.
Testing, testing
In the interests of transparency, here are the tests. (They were run on a 7-year old laptop, so you may laugh at some of the export times.)
Each test was an export of the same timeline with different settings enabled, with MRQ and MBD enabled and disabled, with and without GPU rendering, scaling on/off, etc. Here are the basic sequence settings and export settings.
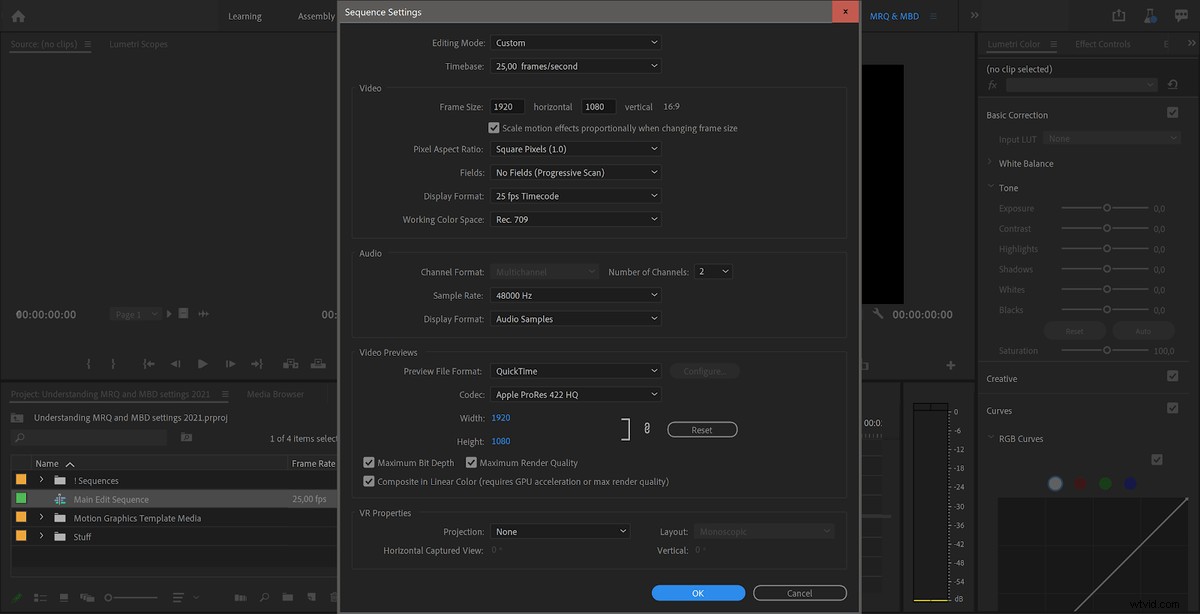
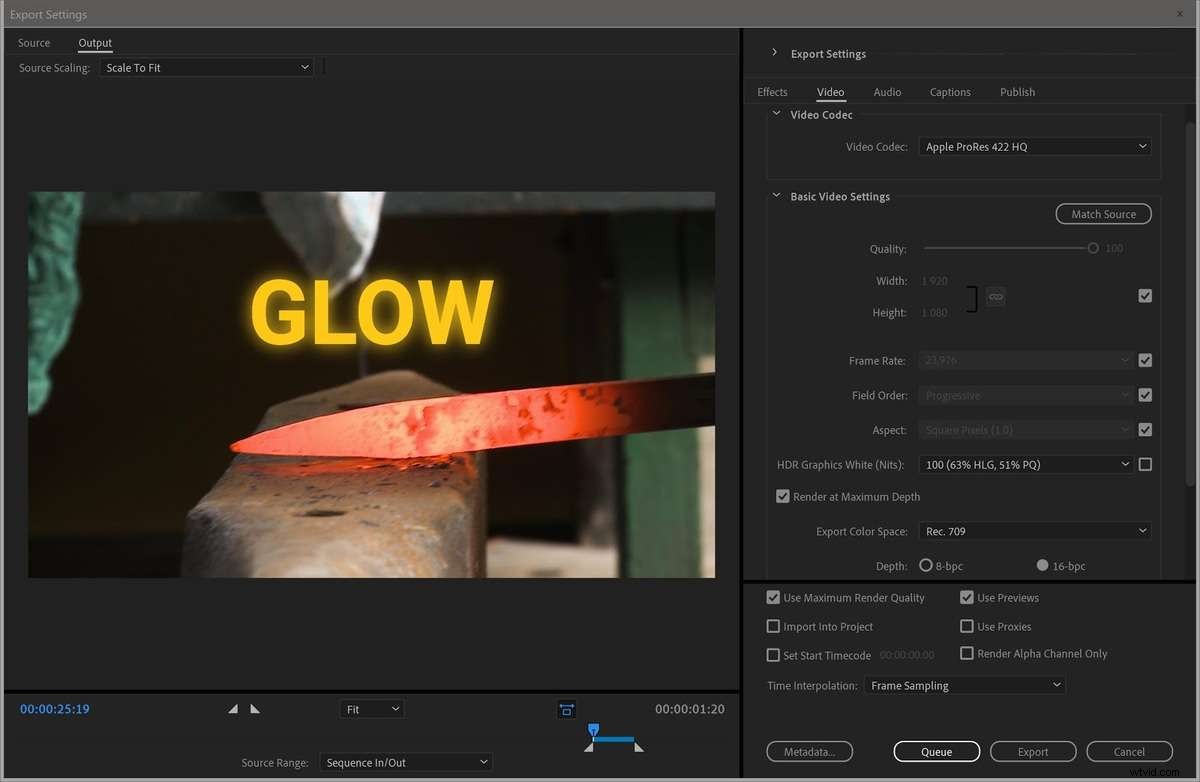
During each export, I monitored the CPU and GPU usage, and timed every export. After each export, I performed a Difference Mode test, to see if any pixels had different values in the different versions.
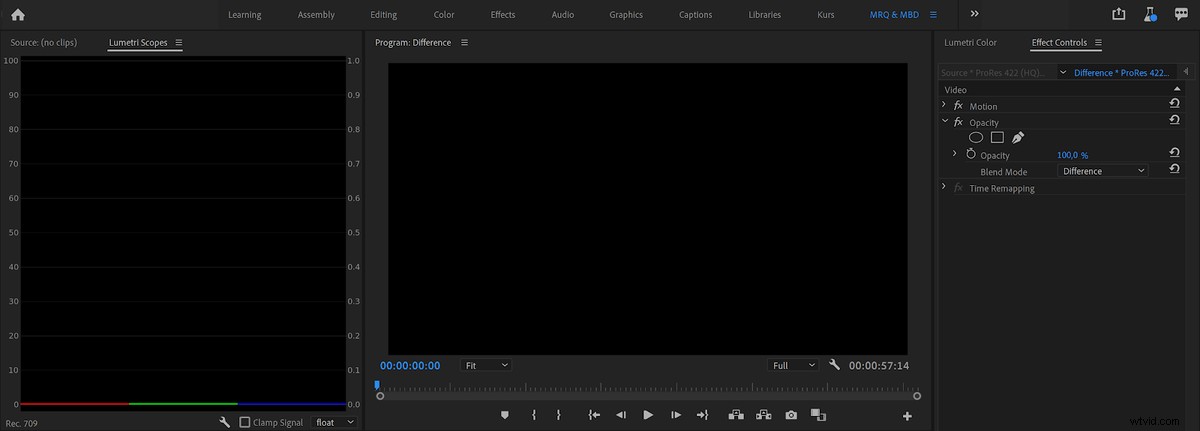
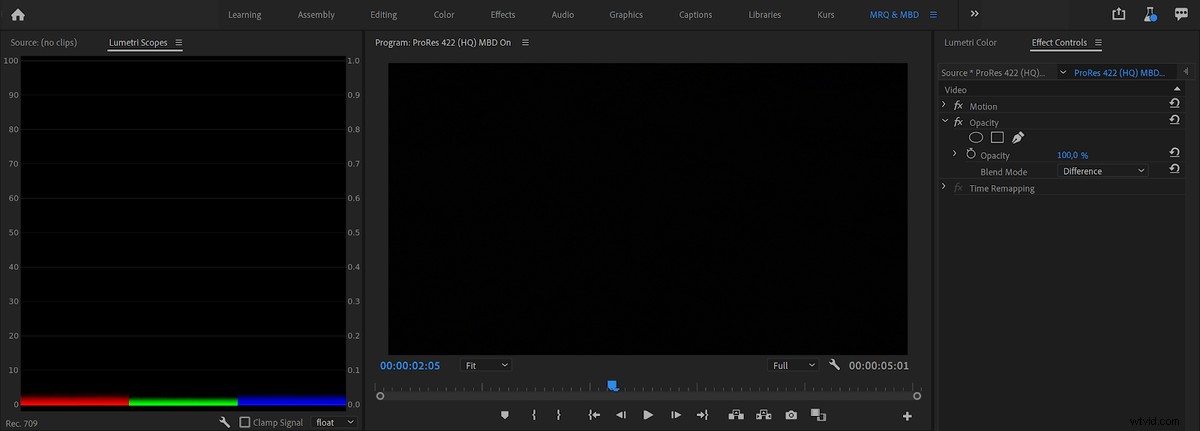
My main testing timeline was a minute long and contained a 10-second clip repeated six times. The source file was 1920x1080px, ProRes 422 HQ, 29.97 fps, progressive. (This matched the export, so in the first test, Smart Rendering kicked in, and the export time was very short.) I also did a test with RED RAW footage.
Let me preface this by saying that these tests are not scientific. I had other software running in the background, and I timed the exports using the stopwatch app on my smartphone, so the timing may be off by at least one second, maybe more. But they’re enough for us to see how different settings affect the exported file and the time the export takes.
Test 1:Export to ProRes 422 HQ, No effects
| # | Sequence | Export | GPU | Export Time | GPU Usage |
| A | MBD off | MBD off | CUDA | 9 sec | - |
| B | MBD on | MBD off | CUDA | 9 sec | - |
| C | MBD off | MBD on | CUDA | 9 sec | - |
| D | MBD on | MBD on | CUDA | 8 sec | - |
| E | MBD off | MBD off | Off | 9 sec | - |
| F | MBD on | MBD off | Off | 9 sec | - |
| G | MBD off | MBD on | Off | 8 sec | - |
| H | MBD on | MBD on | Off | 9 sec | - |
Conclusion:When no effects are added, Premiere Pro uses Smart Rendering on this sequence, regardless of the Maximum Bit Depth value in the Sequence and Export settings. This is indicated by the very low CPU usage. Almost zero processing is going on, and the export is super fast.
Test 2:Comparison of exported files from test 1, Difference mode, No effects
| # | Comparison (Difference Mode) | Program Monitor | Waveform Scope |
| A | Files from A and E in test 1 | Black | Flat line |
| B | Files from A and F in test 1 | Black | Flat line |
| C | Files from A and G in test 1 | Black | Flat line |
| D | Files from A and H in test 1 | Black | Flat line |
| E | Files from A and B in test 1 | Black | Flat line |
| F | Files from A and C in test 1 | Black | Flat line |
| G | Files from A and D in test 1 | Black | Flat line |
Conclusion:All the files are identical. I could see no difference in the program monitor or in the scopes—the waveforms were a straight flat line. They were also exactly the same size, down to the byte.
Test 3:Export to ProRes 422 HQ, with Lumetri effect (RGB Curve), GPU enabled
| # | Sequence | Export | GPU | Export Time | GPU Usage |
| A | MBD off | MBD off | CUDA | 25 sec | 40-90% |
| B | MBD on | MBD off | CUDA | 26 sec | 40-90% |
| C | MBD off | MBD on | CUDA | 38 sec | 40-90% |
| D | MBD on | MBD on | CUDA | 39 sec | 40-90% |
The CPU was constantly around 100% on all cores, and GPU usage was between 40-90% for all exports. Only when the export setting is changed does the file size differ, and a fuzzy line shows in the scopes. Files exported with MBD on in export settings are identical (down to the byte) no matter what the sequence setting is. Files exported with MBD off in export settings are also identical (down to the byte) no matter what the sequence setting is.
Conclusion:Export settings affect export times, and what algorithm is used. Sequence settings do not affect the exported files, unless you enable Use Previews in the export settings.
Test 4:Export to ProRes 422 HQ, with Lumetri effect (RGB Curve), GPU disabled
| # | Sequence | Export | GPU | Export Time | GPU Usage |
| A | MBD off | MBD off | Off | 2 min 14sec | – |
| B | MBD on | MBD off | Off | 2 min 16 sec | – |
| C | MBD off | MBD on | Off | 2 min 30 sec | – |
| D | MBD on | MBD on | Off | 2 min 28 sec | – |
The CPU was constantly around 100% on all cores for all exports. When the export setting is changed the file sizes differ, and a fuzzy line also shows in the scopes. Files exported with MBD on in export settings are identical (down to the byte) no matter what the sequence setting is. Files exported with MBD off in export settings are also identical (down to the byte) no matter what the sequence setting is.
Conclusion:Export settings affect export times, and what algorithm is used, but sequence settings do not, unless you enable Use Previews in the export settings.
Test 5:Difference mode, with Lumetri effect (RGB Curve)
| # | Comparison (Difference Mode) | Program Monitor | Waveform Scope |
| A | Off-off GPU vs on-off GPU | Black | Flat line |
| B | Off-off GPU vs off-on GPU | Black | Fuzzy line |
| C | Off-off GPU vs on-on GPU | Black | Fuzzy line |
| D | Off-off CPU vs off-on CPU | Black | Fuzzy line |
| E | Off-off CPU vs on-off CPU | Black | Flat line |
| F | Off-off CPU vs on-on CPU | Black | Fuzzy line |
| G | All GPU vs CPU | Black | Fuzzy line |
Conclusion:Premiere Pro uses slightly different algorithms in CPU and GPU mode, so files exported with GPU enabled and GPU disabled are slightly different. The export settings make an impact on the exported file—sequence settings have no influence on the exported file, unless you enable Use Previews in the export settings.
Test 6:Export to ProRes 422 HQ, no scaling
| # | Sequence | Export | GPU | Export Time | GPU Usage |
| A | MRQ off | MRQ off | CUDA | 8 sec | - |
| B | MRQ on | MRQ off | CUDA | 8 sec | - |
| C | MRQ off | MRQ on | CUDA | 8 sec | - |
| D | MRQ on | MRQ on | CUDA | 8 sec | - |
| E | MRQ off | MRQ off | Off | 8 sec | - |
| F | MRQ on | MRQ off | Off | 8 sec | - |
| G | MRQ off | MRQ on | Off | 8 sec | - |
| H | MRQ on | MRQ on | Off | 8 sec | - |
Conclusion:When no scaling is going on, Premiere Pro uses Smart Rendering, and all the exported files are identical.
Test 7:Export to ProRes 422 HQ, with scaling set to 120%
| # | Sequence | Export | GPU | Export Time | GPU Usage |
| A | MRQ off | MRQ off | CUDA | 25 sec | 40-85% |
| B | MRQ on | MRQ off | CUDA | 25 sec | 40-85% |
| C | MRQ off | MRQ on | CUDA | 25 sec | 40-85% |
| D | MRQ on | MRQ on | CUDA | 25 sec | 40-85% |
| E | MRQ off | MRQ off | Off | 35 sec | – |
| F | MRQ on | MRQ off | Off | 35 sec | – |
| G | MRQ off | MRQ on | Off | 3 min 55sec | – |
| H | MRQ on | MRQ on | Off | 3 min 55sec | – |
The CPU was constantly around 100% on all cores for all exports. Files exported with MBD on in export settings are identical (down to the byte) no matter what the sequence setting is. Files exported with MBD off in export settings are also identical (down to the byte) no matter what the sequence setting is. Files exported with GPU enabled and GPU disabled are slightly different.
Conclusion:Export settings affect export times in Software mode, and what algorithm is used, but Sequence settings have no impact on the exported files, unless you enable Use Previews in the export settings.
Test 8:Difference mode, with scaling
| # | Comparison (Difference Mode) | Program Monitor | Waveform Scope |
| A | All GPU vs GPU | Black | Flat line |
| B | GPU vs off-off CPU | Black | Fuzzy line |
| C | GPU vs on-off CPU | Black | Fuzzy line |
| D | GPU vs off-on CPU | Black | Fuzzy line |
| E | GPU vs on-on CPU | Black | Fuzzy line |
| F | On-off CPU vs off-off CPU | Black | Flat line |
| G | On-off CPU vs off-on CPU | Black | Fuzzy line |
| H | Off-on CPU vs on-on CPU | Black | Flat line |
Files exported with MBD on in export settings are identical (down to the byte) no matter what the sequence setting is. Files exported with MBD off in export settings are also identical (down to the byte) no matter what the sequence setting is. Only when the export setting is changed does the file size differ, and a fuzzy line shows in the scopes.
Conclusion:Premiere Pro uses slightly different algorithms in CPU and GPU mode. Export settings affect export times, and what algorithm is used, but Sequence settings have no impact on the exported files, unless you enable Use Previews in the export settings.
Test 9:Export to ProRes 422 HQ, with rotation set to 10 degrees, no scaling
| # | Sequence | Export | GPU | Export Time | GPU Usage |
| A | MRQ off | MRQ off | CUDA | 27 sec | 40-95% |
| B | MRQ on | MRQ off | CUDA | 26 sec | 40-95% |
| C | MRQ off | MRQ on | CUDA | 25 sec | 40-95% |
| D | MRQ on | MRQ on | CUDA | 25 sec | 40-95% |
| E | MRQ off | MRQ off | Off | 37 sec | – |
| F | MRQ on | MRQ off | Off | 37 sec | – |
| G | MRQ off | MRQ on | Off | 5 min 26sec | – |
| H | MRQ on | MRQ on | Off | 5 min 26sec | – |
CPU was constantly around 100% on all cores for all exports. Files exported with MBD on in export settings are identical (down to the byte) no matter what the sequence setting is. Files exported with MBD off in export settings are also identical (down to the byte) no matter what the sequence setting is.
Conclusion:Premiere Pro uses slightly different algorithms in CPU and GPU mode. Export settings affect export times, and what algorithm is used, but Sequence settings have no impact on the exported files, unless you enable Use Previews in the export settings.
Test 10:Difference mode, with rotation set to 10 degrees, no scaling
| # | Comparison (Sequence Export) | Program Monitor | Waveform Scope |
| A | All GPU vs GPU | Black | Flat line |
| B | GPU vs off-off CPU | Black | Fuzzy line |
| C | GPU vs on-off CPU | Black | Fuzzy line |
| D | GPU vs off-on CPU | Black | Fuzzy line |
| E | GPU vs on-on CPU | Black | Fuzzy line |
| F | On-off CPU vs off-off CPU | Black | Flat line |
| G | On-off CPU vs off-on CPU | Black | Fuzzy line |
| H | Off-on CPU vs on-on CPU | Black | Flat line |
All files exported with GPU enabled are identical, no matter what the sequence or export settings are. Files exported with GPU disabled with MRQ off are identical whatever the sequence settings are. Files exported with GPU disabled with MRQ on are identical) whatever the sequence settings are.
Conclusion:Premiere Pro uses slightly different algorithms in CPU and GPU mode. Only when the export settings are changed does the file size differ, and a fuzzy line shows in the scopes. Sequence settings have no impact on the exported files, unless you enable Use Previews in the export settings.
Test 11:Export to ProRes 422 HQ, with scaling at 120% and Unsharp Mask effect at 0%
| # | Sequence | Export | GPU | Export Time | GPU Usage |
| A | MRQ on | MRQ on | CUDA | 3 min 56 sec | – |
| B | MRQ on | MRQ on | Off | 3 min 54 sec | – |
CPU was constantly around 100% on all cores for all exports. The two files are identical, down to the byte. GPU was not used, even though GPU acceleration was enabled.
Conclusion:Adding a non-accelerated effect to a clip forces Premiere into software only mode for the duration of the clip, even when the GPU acceleration is enabled in Project settings.
Test 12:RED source, Export to ProRes 422 HQ, MBD settings
| # | Sequence | Export | GPU | Export Time | GPU Usage |
| A | MBD off | MBD off | CUDA | 49 sec | 0-90% |
| B | MBD off | MBD on | CUDA | 50 sec | 0-90% |
| C | MBD on | MBD off | CUDA | 49 sec | 0-90% |
| D | MBD on | MBD on | CUDA | 50 sec | 0-90% |
| E | MBD off | MBD off | Off | 4 min 11 sec | – |
| F | MBD off | MBD on | Off | 4 min 31 sec | – |
| G | MBD on | MBD off | Off | 4 min 11 sec | – |
| H | MBD on | MBD on | Off | 4 min 29 sec | – |
The test was performed with a 5.5 seconds clip, R3D REDCODE 8:1, 3792x3160px (anamorphic), with Lumetri (RGB Curves), exported to ProRes 422 HQ at the same size. CPU usage was around 50% on all cores for all exports with GPU, and around 30-40% without the GPU.
The four files exported with GPU enabled are identical, down to the byte, and difference mode shows a straight line in the waveform scope. When comparing exports done with and without MBD with GPU disabled , the line is fuzzy. When comparing exports done with MBD with GPU disabled , the line is straight, and the files are identical, down to the byte. When comparing exports done without MBD with GPU disabled , the line is straight, and the files are identical, down to the byte.
Conclusion:The MBD setting in the export settings affects render times and the exported file only in Software mode. The MBD switch in the sequence settings does not affect the final render unless you check Use Previews in the export settings.
Test 13:RED source, Scaled, Export to ProRes 422 HQ, MRQ settings
| # | Sequence | Export | GPU | Export Time | GPU Usage |
| A | MRQ off | MRQ off | CUDA | 41 sec | 0-50% |
| B | MRQ off | MRQ on | CUDA | 41 sec | 0-50% |
| C | MRQ on | MRQ off | CUDA | 41 sec | 0-50% |
| D | MRQ on | MRQ on | CUDA | 41 sec | 0-50% |
| E | MRQ off | MRQ off | Off | 1 min 50 sec | – |
| F | MRQ off | MRQ on | Off | 5 min 55 sec | – |
| G | MRQ on | MRQ off | Off | 1 min 51 sec | – |
| H | MRQ on | MRQ on | Off | 5 min 54 sec | – |
The test was done with a 5.5 seconds clip, R3D REDCODE 8:1, 3792x3160px (anamorphic), scaled to 120%, exported to ProRes 422 HQ at the same size.
CPU usage was around 60% on all cores for all exports with GPU, about 50% for software exports without MRQ, and around 30-40% for software exports with MRQ. That feels kind of backwards, but that’s what the test showed.
All four files exported with GPU enabled are identical, down to the byte. The files exported with MRQ off and GPU acceleration off were identical, down to the byte. The files exported with MRQ on and GPU acceleration off were also identical, down to the byte.
Conclusion:when you’re in GPU mode, this setting does not matter (unless you have source files that support fractional resolutions). When you’re in Software mode, MRQ in export settings does affect the exported clip, while the sequence setting does not, unless you check Use Previews in export settings.
Test 14:RED source, Scaled to HD, Export to ProRes 422 HQ, MRQ settings
| # | Sequence | Export | GPU | Export Time | GPU Usage |
| A | MRQ off | MRQ off | CUDA | 10 sec | 20-30% |
| B | MRQ off | MRQ on | CUDA | 14 sec | 90-100% |
The test was done with a 5.5 seconds clip, R3D REDCODE 8:1, 3792x3160px (anamorphic), scaled to HD size using Set to Frame Size (25.3%) exported to ProRes 422 HQ HD.
CPU usage was 100% on all cores for both exports. The files are not identical at all, and a Difference mode test shows a thick fuzzy line. Surprisingly, the export done without MRQ seems sharper than the one exported with MRQ. But it’s also more pixelated, so leaving MRQ on results in a more pleasant-looking image with less noise.
Conclusion:With MRQ on, Premiere uses the full res image to create the low-res output. Without MRQ, it uses a partial resolution (half-res, quarter-res, etc.) that wavelet-based codecs like RED and some other formats have built-in. Even with GPU enabled, MRQ will affect exports of these formats.
Test 15:Cineform source, Scaled to HD, Export to ProRes 422 HQ, MRQ settings
| # | Sequence | Export | GPU | Export Time | GPU Usage |
| A | MRQ off | MRQ off | CUDA | 8 sec | 50-100% |
| B | MRQ off | MRQ on | CUDA | 8 sec | 50-100% |
The test was done with a 5.5 seconds clip, GoPro Cineform, 3792x1580px made from the RED clip.
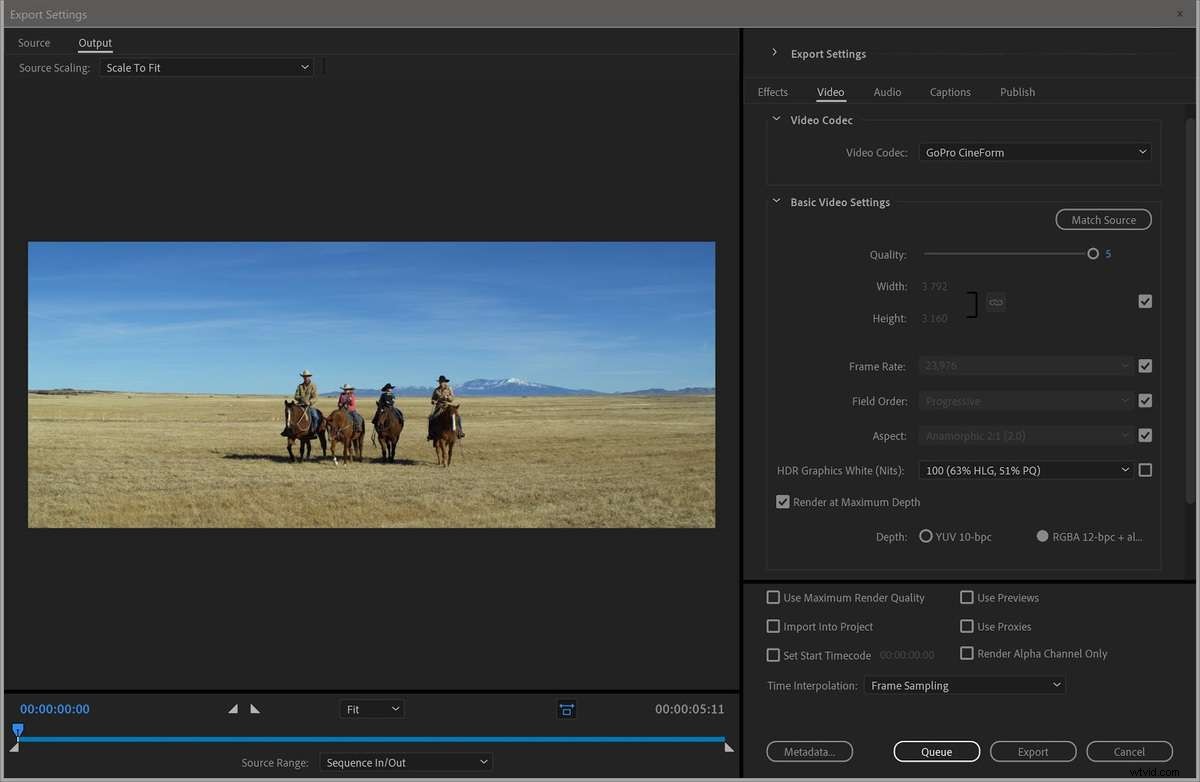
The clip was scaled to HD size using Set to Frame Size (50,6%) exported to ProRes 422 HQ HD.CPU usage was 100% on all cores.
The clips are almost identical, but not quite (144 bytes difference in size). In Premiere, the scopes show a perfectly flat line, though, so the image quality is exactly the same.
I ran the test again with scale set to 50%, and the two files were identical.
Conclusion:Premiere Pro is probably not using partial resolutions when scaling Cineform clips without MRQ enabled. It may be using partial resolutions only when scaling to less than 50%.
Test 16:JPEG2k source, Scaled to HD, Export to ProRes 422 HQ, MRQ settings
| # | Sequence | Export | GPU | Export Time | GPU Usage |
| A | MRQ off | MRQ off | CUDA | 38 sec | 20-50% |
| B | MRQ off | MRQ on | CUDA | 39 sec | 20-50% |
The test was done with a 5.5 seconds clip, JPEG2000, 3792×1580, made from the RED clip.
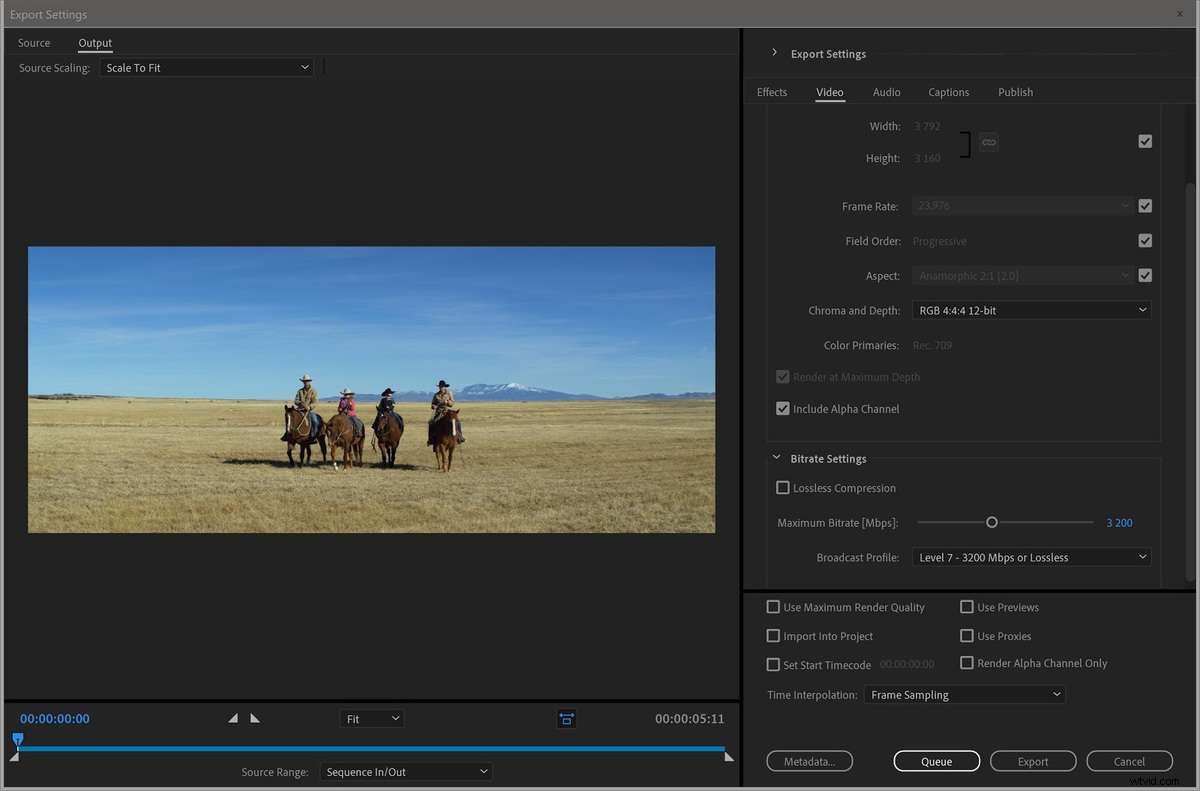
The clip was scaled to HD size using Set to Frame Size (50.6%) exported to ProRes 422 HQ HD. CPU usage was 100% on all cores.
The files are identical, down to the byte. I did the test again with scale set to exactly 50%, and again those two files were identical.
Conclusion:Premiere Pro does not use partial resolutions when scaling JPEG2000 clips, unless it’s only used when scaling to less than 50%.
Test 17:Sony RAW Source, Scaled to HD, Export to ProRes 422 HQ, MRQ settings
| # | Sequence | Export | GPU | Export Time | GPU Usage |
| A | MRQ off | MRQ off | CUDA | 13 sec | 50-90% |
| B | MRQ off | MRQ on | CUDA | 13 sec | 50-90% |
The test was done with a 5.5 seconds Sony RAW clip. The clip was scaled to HD size using Set to Frame Size (46.9%) exported to ProRes 422 HQ HD. CPU usage was 100% on all cores.
The files are identical.
Conclusion:Premiere Pro does not use partial resolutions when scaling Sony RAW clips.
