Camtasia is een veelzijdig en populair videobewerkingsprogramma. Deze pagina geeft u een uitgebreid overzicht van Camtasia wat betreft prijs, interface, functies, enzovoort.
Camtasia-recensie
Camtasia is een stuk multifunctionele en gemakkelijk te leren videobewerkingssoftware die is uitgebracht door TechSmith Company uit de Verenigde Staten. Het kan worden gebruikt voor videobewerking, audiobewerking, het toevoegen van gesproken tekst, belangrijke annotaties, het maken van menu's, PPT-opnamen, het opnemen van computerschermen, het afspelen van video's, enz.
Over het algemeen is het moeilijk om rekening te houden met zowel rijke functies als eenvoudige bewerkingen. Maar Camtasia deed het, wat veel gebruikers verraste. Er zijn niet veel menubalken in de interface, maar ze zijn erg verfijnd, wat erg handig is om de functies te vinden die je nodig hebt. Hiermee kunt u videoclips knippen, overgangseffecten toevoegen, inzoomen op lokale afbeeldingen, illustraties of beeld-in-beeld-effecten toevoegen en meer. Tegelijkertijd omvatten de uitvoerformaten MP4, AVI, WMV, M4V, CAMV, MOV, RM, GIF-animatie en vele andere gangbare formaten, die kunnen worden beschouwd als een uitstekend programma voor het maken van videopresentaties.
Meer recente beoordelingen :LumaFusion-recensie, VideoPad-recensie, iMovie-recensie
(Schermflits bij het openen van het programma)
Voor- en nadelen
Camtasia is een prima startpunt voor nieuwe editors. Het is ook geweldige software voor het opnemen, screencasten en projecteren van tutorials.
PRO'S
- De workflow is eenvoudig en gemakkelijk voor nieuwkomers om aan de slag te gaan.
- Een speciale tutorial-website (https://www.techsmith.com/learn/tutorials/camtasia/) is beschikbaar voor gebruikers om op elk moment te leren.
- Ondersteunt het koppelen van afbeeldingen en videoclips in vele indelingen aan films.
- Vervolgens kan het schermopnameproces worden gepauzeerd en op elk moment opnieuw worden gestart om de daaropvolgende bewerkingstijd te verkorten.
- Responsieve klantenservice verbetert uw ervaring.
- Resolutie tot 4K.
NADELEN
- Het is relatief duur en vereist extra software-upgradekosten.
- Soms loopt het opnameproces vast.
- Watermerk (gratis versie).
Prijzen
Hoewel Camtasia betaalde software is, kunnen gebruikers een gratis proefperiode van 30 dagen krijgen. Dit geeft je voldoende tijd om na te denken of je er $ 299,99 aan wilt uitgeven.

Camtasia-prijslijst
Camtasia krijgen
Ga naar de officiële website van Camtasia om direct te downloaden om de invasie van gebundelde software of virussoftware te voorkomen.
Link naar de officiële website:https://www.techsmith.com/video-editor.html
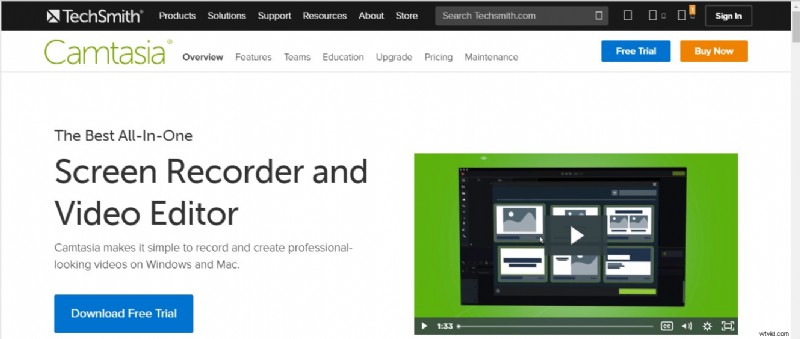
Camtasia downloaden
Hoofdinterface
Wanneer u de hoofdinterface van Camtasia opent, wordt u begroet door vier grote gepartitioneerde panelen:de werkbalk, het videovoorbeeldvenster, de eigenschappenwerkbalk en het tijdlijnpaneel.
Vier partitieweergaven van de hoofdinterface.
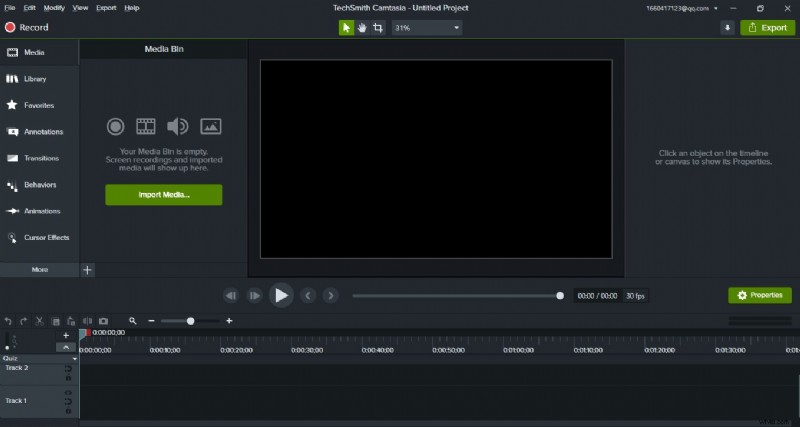
Camtasia-hoofdinterface
Werkbalk
De werkbalk is, zoals de naam al doet vermoeden, een samenvatting van alle functieknoppen die worden gebruikt in het videobewerkingsproces. We kunnen zien dat ook dit gedeelte in twee delen is verdeeld. Aan de linkerkant is de lijst met functies en aan de rechterkant is het weergavegebied, Camtasia heeft alle functies verdeeld in 13 categorieën:
- Media :Plaats alle geïmporteerde materialen, inclusief audio, video, PPT-materialen, enz. U kunt de lay-out van het materiaal wijzigen door het kleine pictogram rechtsonder aan te passen.
- Bibliotheek :De animatie en het logo van Camtasia zijn handig voor gebruikers om te verkrijgen.
- Favorieten :Verzamel annotaties of effecten door op het sterpictogram te klikken.
- Annotaties :voeg annotaties en vormidentificatie toe aan de video of maak een mozaïekeffect door kleur en vervaging aan te passen.
- Overgangen :voeg overgangseffecten toe om elk frame natuurlijker te maken.
- Gedrag :Hoofdzakelijk gebruikt om animatie-effecten toe te voegen aan tekst of video.
- Animaties :pas de effecten aan van zoomen, vertalen, roteren of kantelen van het videobeeld.
- Cursoreffecten :voeg een cursor toe aan de muis om het volgen van muisbewegingen te markeren.
- Gesproken vertelling :om gesproken commentaar op te nemen.
- Audio-effecten :verwijder ruis voor audio of voeg in- en uitfade-effecten toe.
- Visuele effecten :voeg randen toe, verwijder kleuren en versnel of vertraag de snelheid van de video.
- Interactiviteit :voeg een quiz toe om te zien wie de video bekijkt en wat hun voortgang is.
- Onderschriften :voeg ondertitels toe aan de video.
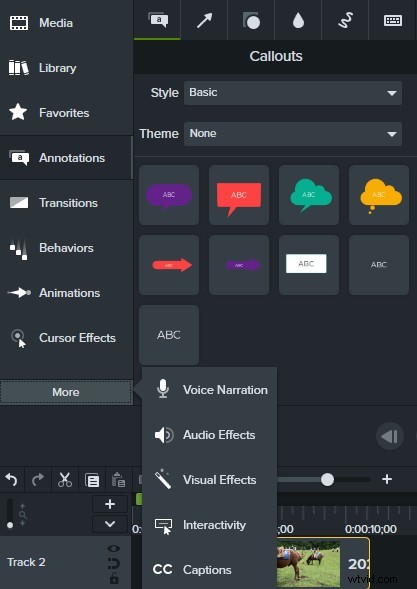
De krachtige gereedschapskist
Videovoorbeeldvenster
In het voorbeeldvenster kunt u niet alleen de clips op de tijdlijn bekijken, maar ook de verschillende effecten. Er zijn vier hoofdknoppen:de knop Bewerken (om de media te verplaatsen, de grootte van het scherm aan te passen of het scherm te draaien), de knop Pannen (of houd gewoon de spatiebalk ingedrukt om het scherm te slepen om een beter beeld te krijgen), de knop Bijsnijden (of houd gewoon de Alt-toets ingedrukt om ongewenste delen van het scherm weg te snijden), en het canvas schaalt en vergroot of verkleint. Handig onder het voorbeeldvenster van Camtasia bevinden zich de knoppen voor afspelen, pauzeren en de totale duur van de video.
De schaal van het scherm kan worden aangepast met het muiswiel.
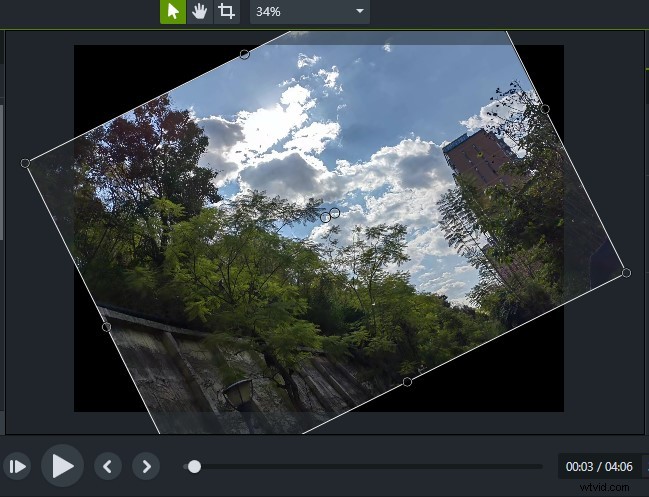
Camtasia Preview Window
Properties Toolbar
On the right-hand side of the main Camtasia screen, there is a prominent little green box – Properties. Here you can not only see the current settings of the selected screen. You can also set and adjust the Scale, Opacity, Rotation, Position, Width, and Height of the target. This column is also very important during the operation. (Hide with two clicks)
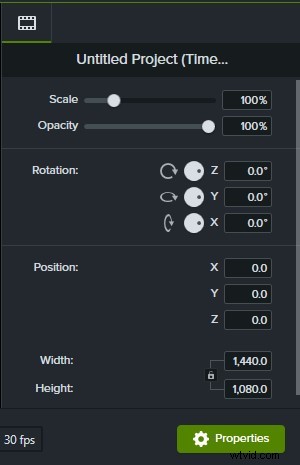
Camtasia Properties
Tijdlijnpaneel
There are two main ways to add the timeline in Camtasia. The first one is to drag the material directly from the material library to the timeline. The second is to click “+” on the left side of the timeline panel to add it. At the same time, the arrow buttons in the upper left and right directions have the functions of undo and return respectively, which gives you a chance to try and make mistakes. Here, cutting and segmentation are two functions that are easily confused. When you drag the cursor of the timeline to a picture, if you click Cut, the whole picture will disappear. If you click the split button, that picture will be split into two separate frames. The Copy and Paste buttons are the same as the Copy and Paste function we use every day. It can copy the effect or animation to the clipboard and paste it to the position you need. The active axis next to the magnifying glass icon can zoom in and out the entire timeline, which is used to adjust the time interval gap. This is very necessary when intensive care is needed. Similarly, the vertical movable axis on the left can adjust the height of each time axis. In the timeline, you can hide, lock, and enable the tracks on the timeline.
Use the red and green cursors above the timeline to Mark or add Quiz.

Camtasia Timeline Panel
Screen Recording
Camtasia’s best feature is the screen recording function, which can be regarded as one of the best software on the market at present, and it is in line with industry standards.
Click Record (shortcut Ctrl+R) on the top left of the main interface to directly enter the screen recording field. Then a small black box appears on your screen. Take Camtasia 2021 as an example. After clicking, there will be five parts:Screen, Integrated camera, Conexant SmartAudio HD, System Audio, and a Start button. You can accept the system’s default full-screen recording settings or choose to customize the screen recording range. Click on the drop-down arrow of the screen box and you will see more options. Clicking on Custom Region will allow you to make your screen size selection just like a screenshot. A preset window (16:9) will also be available in the software. If your recorded media will eventually be posted to Instagram or Facebook, Camtasia is kind enough to offer you a choice of platform-compliant options. Whether you turn the camera on or off is up to you. You can choose to turn the camera off when you are presenting a PowerPoint or tutorial and turn it on when you broadcast live. Also, if you only want to record your voice, you can simply turn off the System Audio option. So that some system sounds don’t make the whole video noisy. The microphone’s sound can be adjusted in size depending on the situation, usually with the option to turn the volume to maximum. Some preferences can also be set via Tool. Once all the details have been adjusted you can record directly by clicking the red button (shortcut F9). Camtasia allows you to pause the recording at any time after it has started, a feature that effectively saves some of the subsequent editing time. Click the Stop button (shortcut F10) when the recording is finished. The recorded material will be automatically saved to the Camtasia media pool and timeline. If there are frequent errors or unexpected situations during the recording process, you can delete them by clicking the Delete button and the interface will revert to the previous recording frame settings panel.
After recording with the use of Cursor Effects can highlight an area or clear mouse click position.

Camtasia Screen Recording
Audio Effects
When you import a piece of audio into Camtasia, you will see a green horizontal line on the timeline, which you can pull to adjust the sound level of the entire audio directly. Select Audio Effects in the toolbar to add effects directly to the audio. For example, you can embed a Fade in or Fade out sound effect at the beginning or the end. When you want to highlight the climax, you can add Emphasize sound effects, etc. The most noteworthy is the Noise Removal. Just drag it onto the entire audio and the system will automatically do the noise removal for you. This is very convenient and fast. Although Camtasia’s built-in settings for sound adjustments are limited and not up to the professional standards. But for most users, it can already meet their daily needs.
Slow playing sound can also play a role in setting off the atmosphere.

Camtasia Audio Effects
Interactivity
The interactive function of Camtasia is also very powerful. This is very suitable for teachers and some other online education lecturers. You can set the Quiz in the middle or the end of a course, change the quiz name in Properties, select the quiz type, set questions and answers, and check Display Feedback. Finally, you will find that you can adjust the follow-up of whether you answered correctly or not. If answerers don’t fill out the correct answer, you can set the video to automatically turn to a certain place to review again. And Camtasia allows you to set multiple questions. At the same time, viewers can also get happiness from multiple-choice, fill in the blank, short answers, and true/false.
This feature can be effective in keeping you focused during the viewing process.
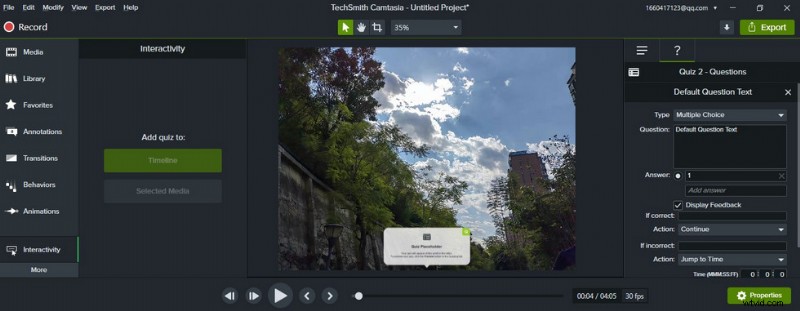
Camtasia Interactivity
Animations
The Animations feature in Camtasia can be used to enhance the viewing experience by zooming in, zooming out, rotating, and other effects to emphasize a screen, video, or commentary. Camtasia has 10 built-in Animations effects, which are similar to a camera lens zooming in for a close-up effect. The principle of each effect is similar except for Full Opacity and No Opacity, which are transparency adjustments. Select an effect and drag it to the clip-on top of the timeline. At this point, an arrow icon will appear on the timeline, which means it was successfully added. Click Zoom-n-Pan in the function bar to select the range where you want to generate the effect. If you want to revert to the original scale in subsequent playback, just click Scale to fit. You can change the time of the zoomed-in and zoomed-out effects by directly elongating or shortening the arrows on the timeline.
Partial zoom animation show effect.
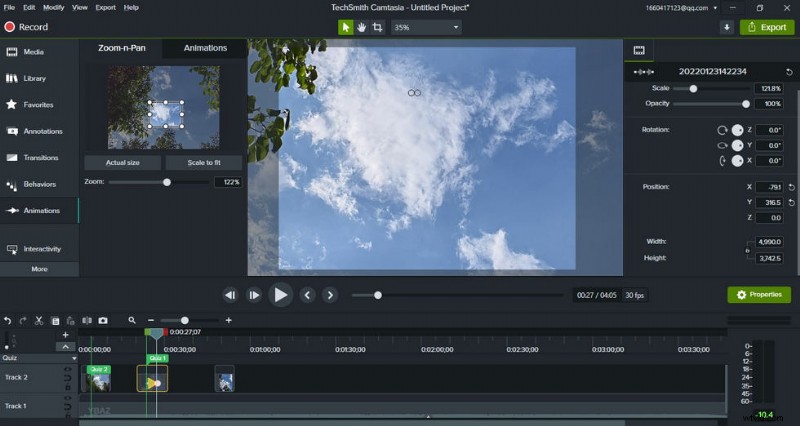
Camtasia Animations
Export
Once you’ve finished your clip and made sure it’s error-free, you can then export your entire work. Click directly on the Export option at the top and you’ll find that Camtasia gives you a variety of options for exporting and sharing:Local File, Screencast.com, Knowmia, TechSmith Video Review, Vimeo, YouTube, and Google Drive. You can also export a clip or audio separately.
The exported video formats are mainly MP4, WMV, AVI, GIF, M4A, WAV (Windows); or MP4, MOV, GIF, M4A, WAV (Mac). You can set the video size, frame rate, encoding mode, color mode, and other related specific parameters independently. Preview available before export.
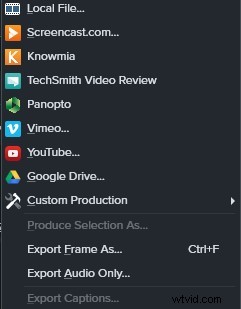
Camtasia Export
Apparaatondersteuning
Camtasia can run on both Windows and Mac.
Notes:
Windows 7 and below no longer support Camtasia 9.0 and above.
Windows 7/Windows XP please download version 3.0.
Is Camtasia Worth Purchasing?
All in all, Camtasia is a piece of very user-friendly video editing software. Its simple interface and rich training resources make your editing journey enjoyable and easy. Therefore, it is perfect for newcomers to the world of video editing. Camtasia can help you create training videos, explainer videos, live game recordings, video conference recordings, and more. This powerful feature is worth pursuing even for professionals.
Camtasia is designed to promote “Everyone can make a great looking video” to encourage all users to give it a try. 30 days trial period is set up to allow you to fully understand and experience Camtasia before deciding whether you want to purchase the Subscription.
Meer gerelateerde artikelen
- Top 10 MP4 naar MP3-converters
- De beste alternatieven voor Windows Movie Maker
- Top 3 apps om YouTube naar MP3 voor iPhone te converteren
- 10 aanbevolen Chroma Key-software
- 12 beste videobewerkingssoftware voor YouTube
