Nikon's Picture Controls bestaan al eeuwen op zijn digitale camera's om Jpeg's een bepaalde look te geven die past bij de scène of de stemming van de fotograaf. Aanvankelijk omvatte de lijst met opties Standaard, Neutraal, Levendig, Monochroom, Portret en Landschap, waarbij Automatisch werd toegevoegd om de camera de meest geschikte keuze te laten bepalen en Vlak kwam langs voor gebruik bij het opnemen van video. Meer recent is er een verzameling van 20 Creative Picture Controls toegevoegd en deze vind je op camera's als de Nikon D780, Nikon Z5, Nikon Z6 II en Nikon Z7 II. Ze hebben namen als Dream, Morning, Pop, Sunday, Silence en Bleached, en ze gaan verder dan de gebruikelijke kleine aanpassingen van scherpte, verzadiging en contrast om creatievere beelden te produceren die dramatisch kunnen verschillen van het standaardresultaat.
Hoewel je de afbeeldingen nog enigszins kunt bewerken, wordt het effect van een Picture Control 'ingebakken' in een Jpeg, maar de onbewerkte bestanden bevatten nog steeds alle kleurgegevens. Naast het toepassen van de Picture Controls op Jpeg's in de opnamefase, is het ook mogelijk om ze toe te passen met behulp van de NEF (RAW)-verwerkingsbesturingselementen van de Nikon-camera in het retoucheermenu, of met behulp van de bedieningselementen in Adobe Lightroom Classic en Adobe Camera Raw.
Natuurlijk zal niet iedereen alle effecten van Nikon's Creative Picture Controls waarderen en ze werken niet bij elke scène, maar ze kunnen een geweldige manier zijn om de modus van een scène te verbeteren of een interessant beeld te creëren in minder dan perfecte omstandigheden . Zo werkt het.

Het gebruik van Nikon's Picture Controls in de camera tijdens het fotograferen
01 Schiet raw en jpeg
Omdat het effect van de Picture Controls in Jpeg's is ingebouwd, is het een goed idee om tegelijkertijd RAW- en Jpeg-bestanden op te nemen, omdat dit u meer flexibiliteit geeft om het uiterlijk van uw afbeeldingen te veranderen.
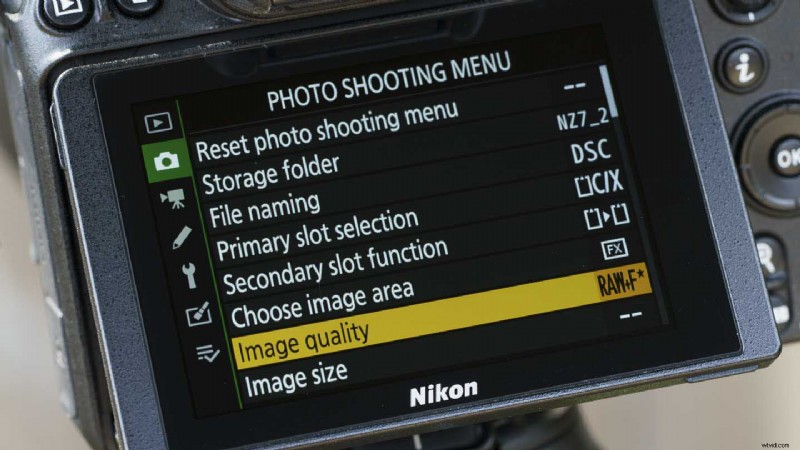
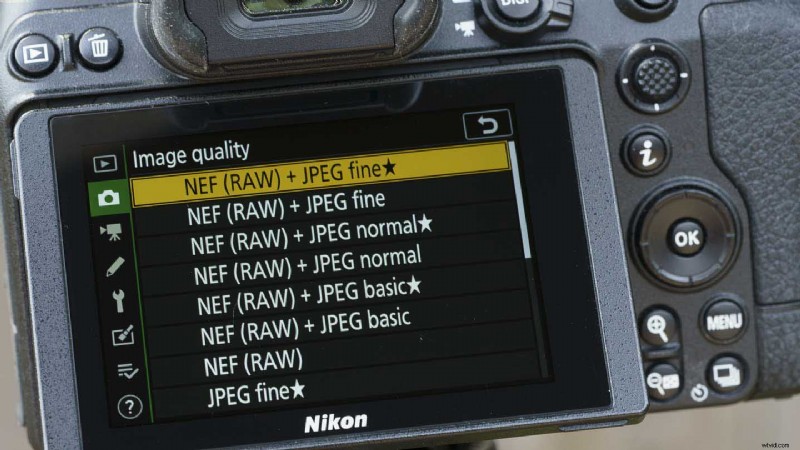
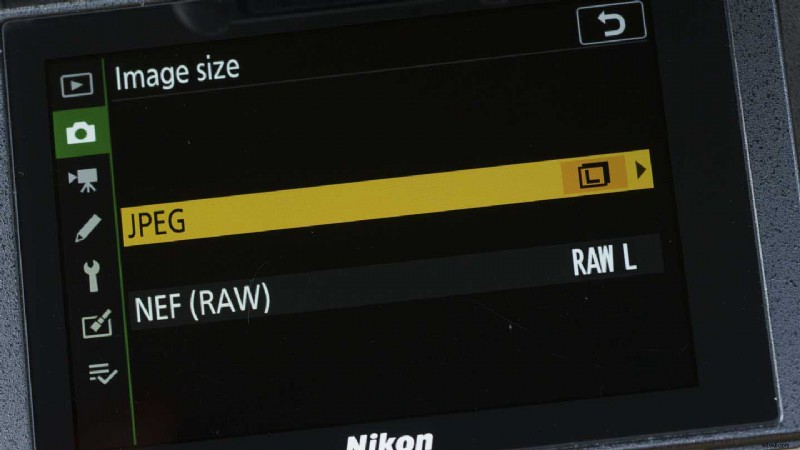
Druk op de menuknop en navigeer naar 'Beeldkwaliteit' in het opnamemenu. Druk vervolgens op de knop 'OK' of tik op 'Beeldkwaliteit' in het menu om de opties weer te geven. Voor de best mogelijke kwaliteit selecteert u ‘NEF (RAW) + JPEG fijn’ en drukt u nogmaals op de knop ‘OK’.
Selecteer vervolgens 'Beeldformaat' onder 'Beeldkwaliteit' in het menu en zorg ervoor dat u zowel Jpeg- als RAW-bestanden hebt ingesteld om op te nemen in het grote (L) formaat.
02 Selecteer de Picture Control
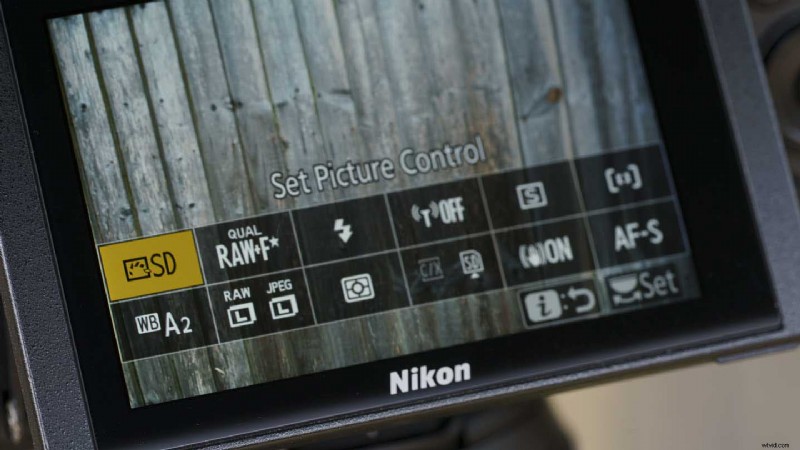
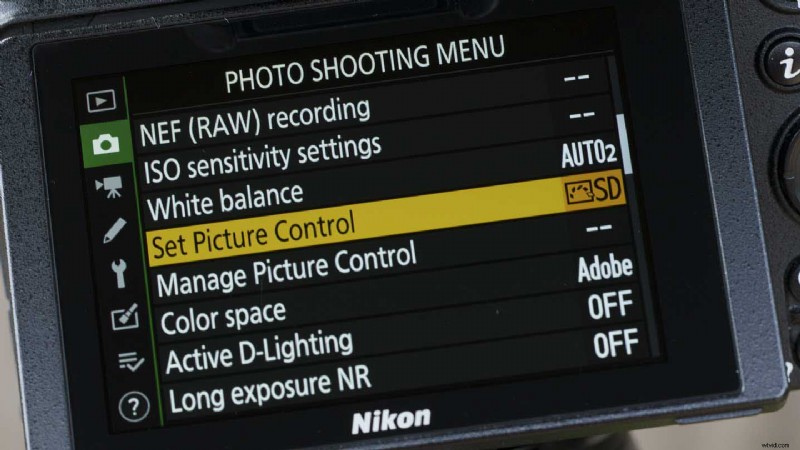
Standaard zijn de Picture Controls toegankelijk via het 'i'-menu dat toegankelijk is door op de 'i'-knop op Nikon-camera's te drukken, maar als u dat menu hebt aangepast en de optie hebt verwijderd, vindt u deze in het hoofdmenu .
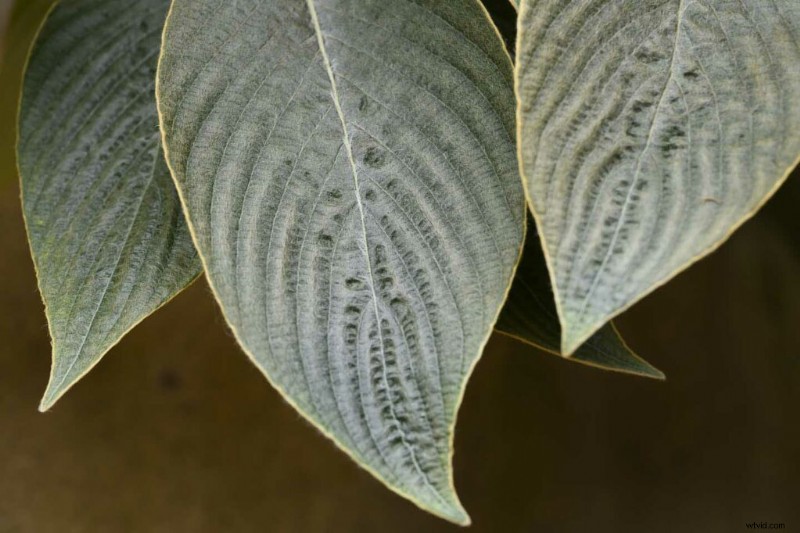
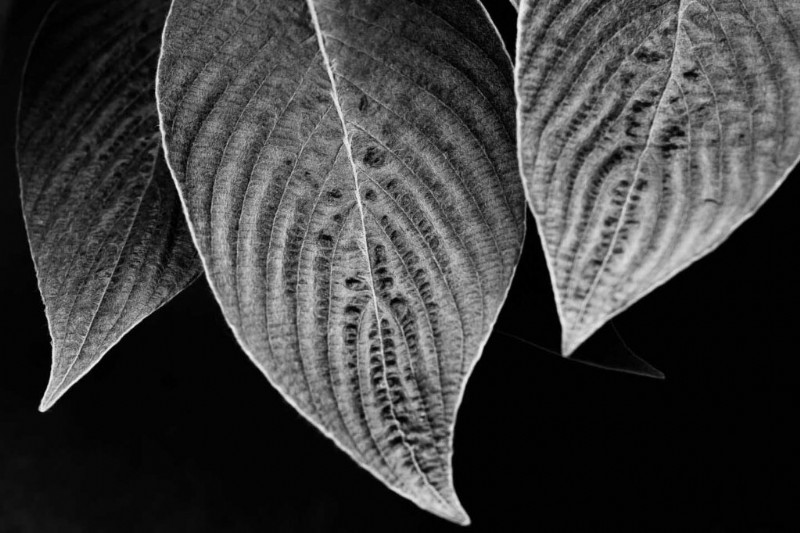
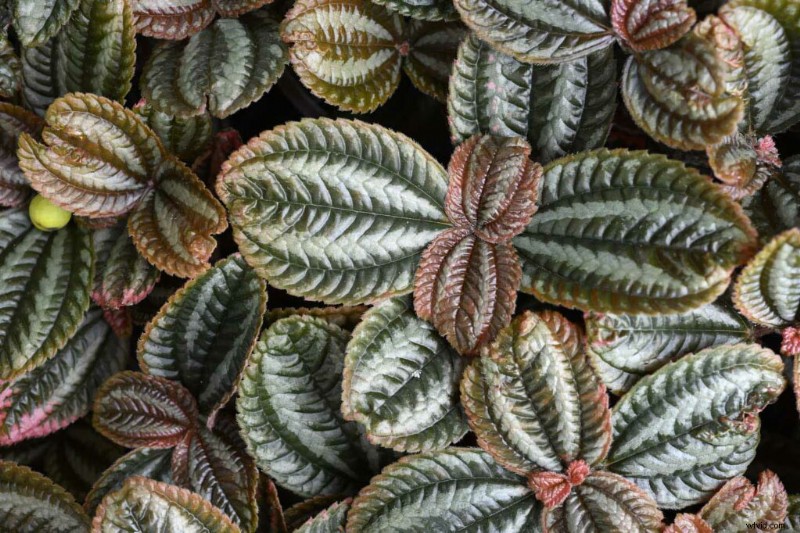
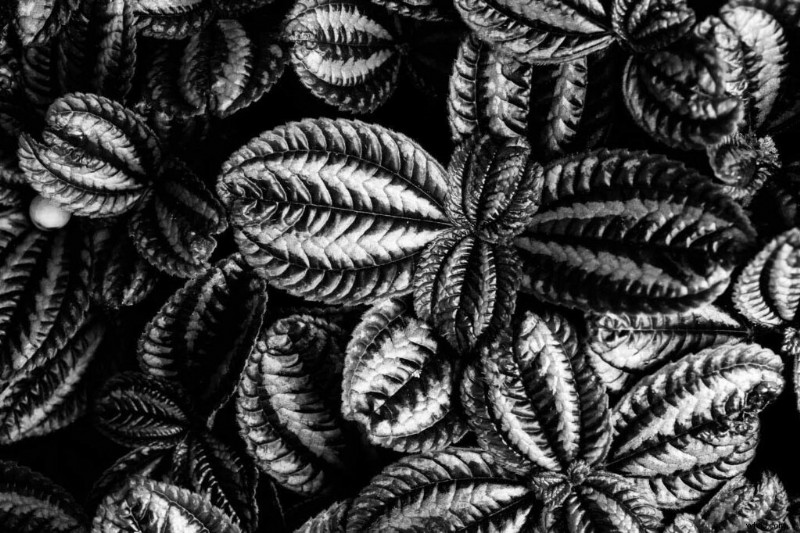
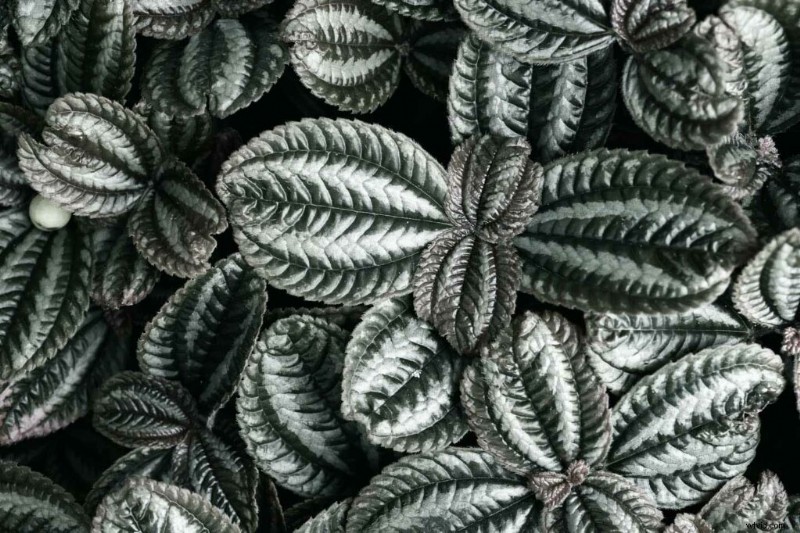
Zoek gewoon 'Set Picture Control' in een van de menu's en druk op de knop 'OK' of tik erop op het scherm. Blader vervolgens door de opties totdat u degene vindt die u wilt gebruiken (of proberen). 08 Bleached is een favoriet van mij.
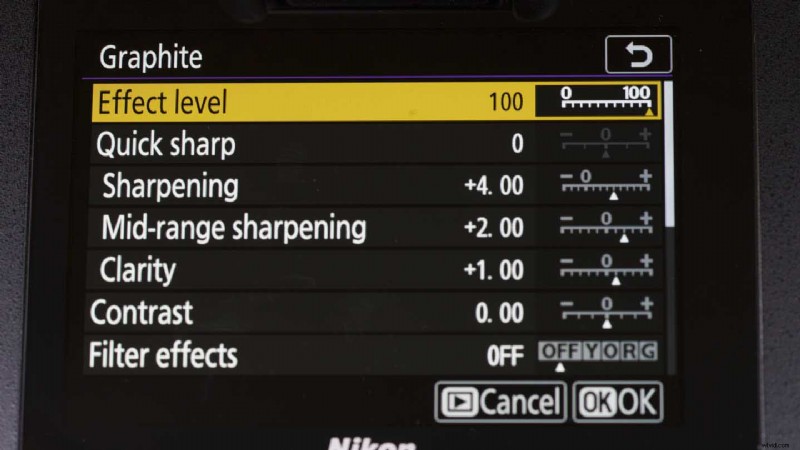
03 Pas de instellingen aan
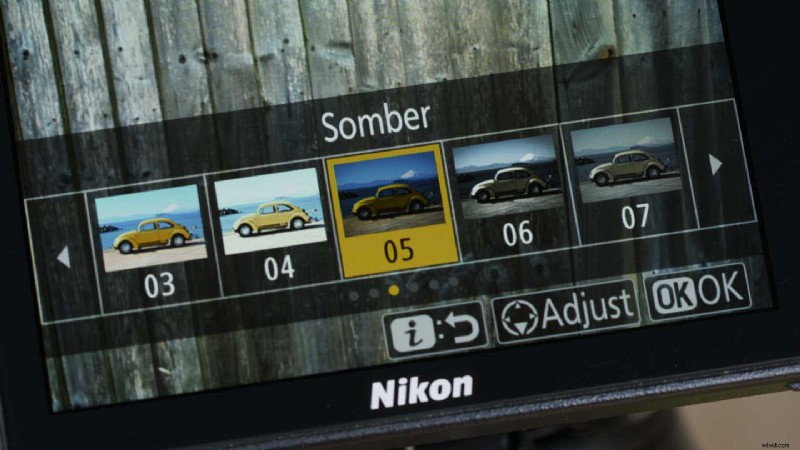
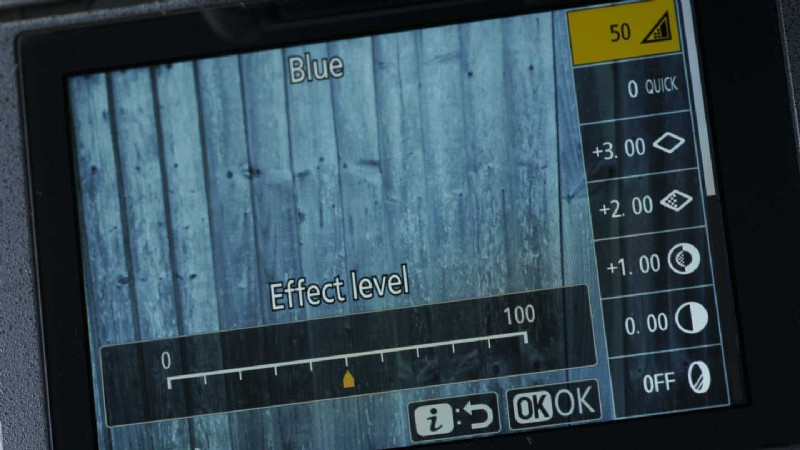
U kunt elk van de Creatieve Picture Controls in hun standaardconfiguratie gebruiken, maar net als bij de andere Picture Controls kunt u hun instellingen aanpassen. Navigeer hiervoor naar de Picture Control op dezelfde manier als in stap 2 en druk met de Picture Control die u wilt gebruiken gemarkeerd op de navigatietoets omlaag op de camera.
Er verschijnt een lijst met parameters voor aanpassing, waaronder de mogelijkheid om het toegepaste effectniveau te verminderen.
Selecteer de parameter die u wilt aanpassen met de omhoog/omlaag-knoppen, of tik op het scherm en gebruik vervolgens de links/rechts-knoppen of tik op de schaal op het scherm om de waarde aan te passen. Als je tevreden bent, druk je op de knop 'OK'.
04 Schieten
Als je een spiegelloze camera van Nikon hebt, zie je de impact van je geselecteerde Picture Control in de zoeker en op het scherm. Als je een DSLR gebruikt, moet je overschakelen naar de Live View-modus om de scène te zien met Picture Control toegepast.
Een Picture Control toepassen na het vastleggen in de camera
01 Zoek het retoucheermenu
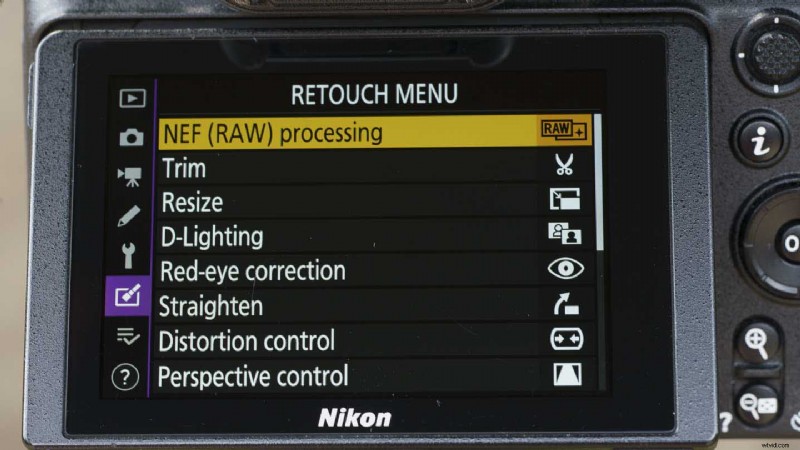

Nadat u klaar bent met fotograferen, drukt u op de knop 'Menu' en bladert u naar het pictogram 'Menu retoucheren' of tikt u erop. Zoek en selecteer 'NEF (RAW)-verwerking' bovenaan het scherm. Then tap on ‘Select image(s)’ or selected it in the menu and press ‘OK’.
02 Select the image(s)
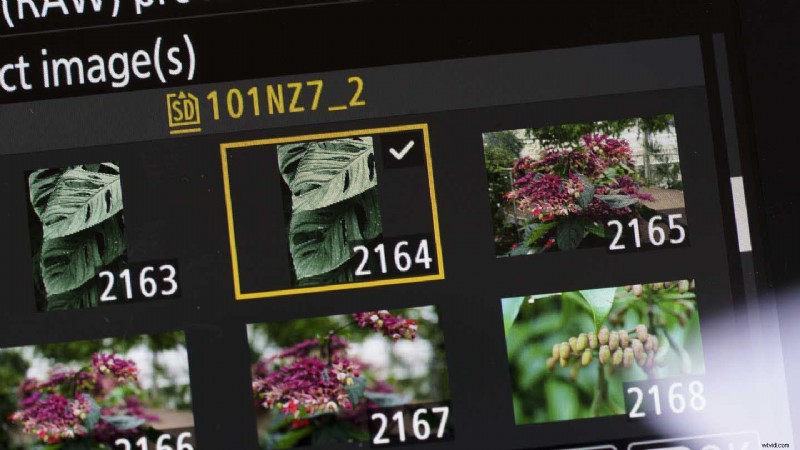
Browse through the images and use the zoom out button to add a tick to the thumbnail(s) of the one(s) you want to edit. Alternatively, tap once on the image to select it and tap again to add the tick.
Once you’ve selected the image(s) you want to edit, press the ‘OK’ button.
03 Make the edits
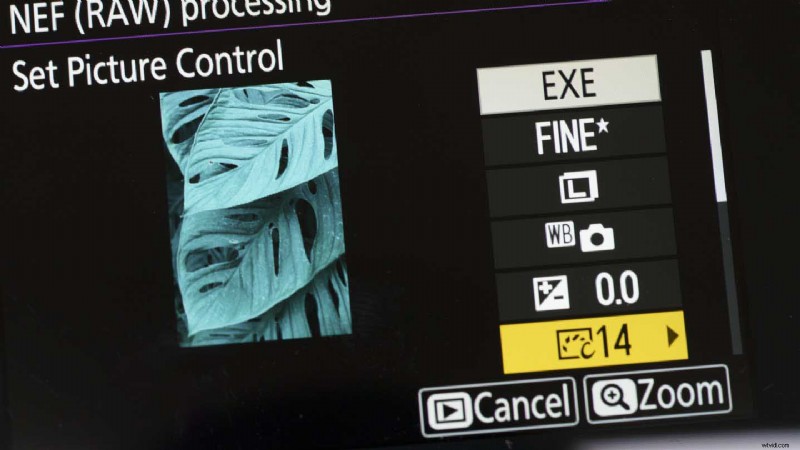
You’ll now see a screen with one of the images and a short list of the parameters available for adjustment. The Picture Control is at the bottom of the first page of the list. Tap on it or use the right navigation key to see a list of all the available Picture Controls.
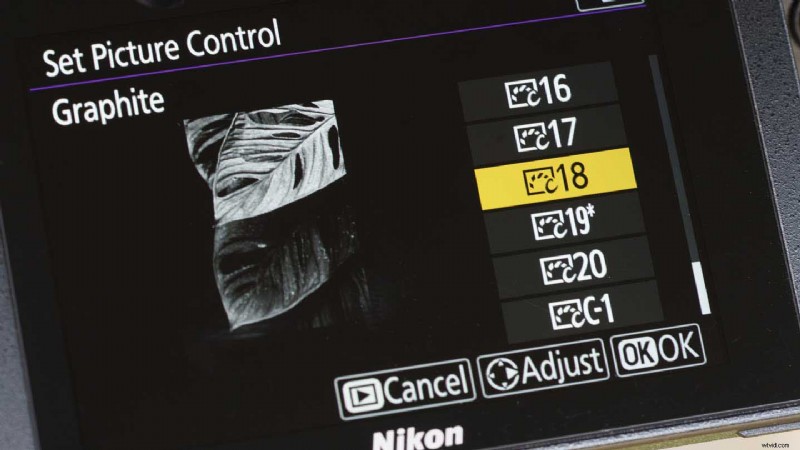
As you tap on any of the alternative Picture Controls, or navigate up and down using the navigation controls, you’ll see the image change as the new effect is applied. When you’ve find the one you want, you can either press ‘OK’ to apply it or you can press the right navigation button to access the same adjustment controls that are available for tailoring the image when using the Picture Controls at the shooting stage.
Make any edits that you want before pressing ‘OK’ and then scrolling up to ‘EXE’ to save the image as a Jpeg.
Using Nikon Picture Controls with raw files
Adobe Lightroom Classic and Adobe Camera Raw, which is the raw file editor supplied with Adobe Photoshop, both have the profiles to replicate the impact of using Nikon’s Picture Controls with Nikon camera raw files at the processing stage. It’s really easy to apply them in either software package and you can use them in combination with all the usual editing controls. Zo werkt het:
01 Open the image
If you’re using Adobe Lightroom you first need to import the images to the software, but if you’re using Adobe Photoshop you just need to locate the file(s) you want to work on and then open it/them. Photoshop automatically opens Adobe Camera Raw when you attempt to open a compatible raw file.
02 Select the profile in Adobe Camera Raw
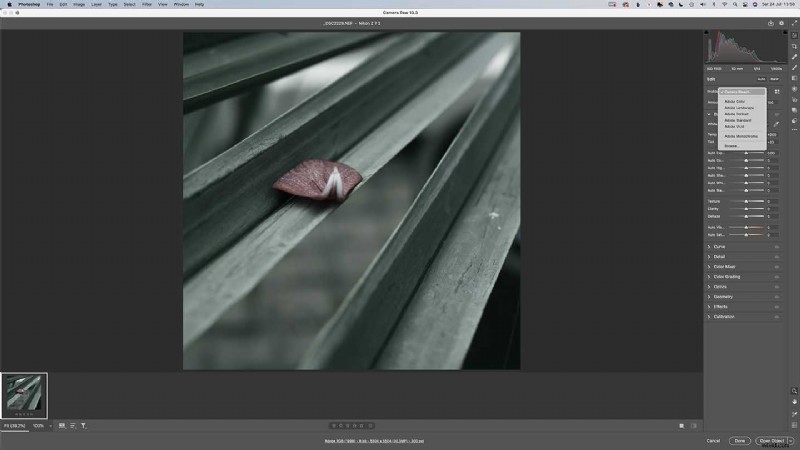
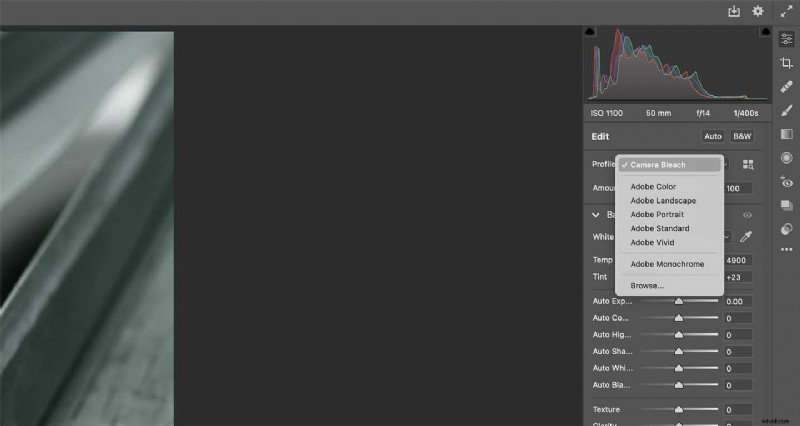
With the image open in Adobe Camera Raw, select the ‘Edit’ icon at the top of the adjustment icons and then find ‘Profile’ near the top of the adjustment panel, it’s immediately under ‘Edit’. It will show ‘Camera’ and the name of the Picture Control that you used originally.
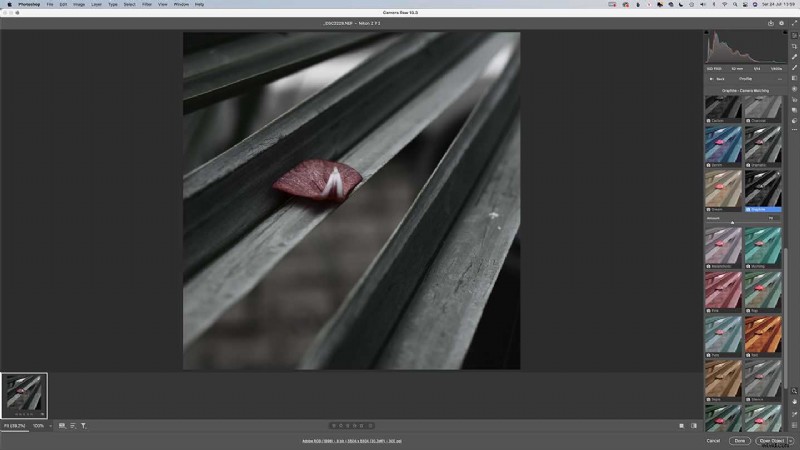
Click on the dropdown arrow to the right of the profile name to reveal the options available. You’ll see a short list of Adobe options followed by ‘Browse’. Click on ‘Browse’ and, if necessary, ‘Camera Matching’. This will reveal thumbnails of all the Picture Controls available. Just scroll until you find the one you want – the main image on the screen while change to show a preview if you hover over any of the thumbnails.
Once you’ve selected the Picture Control you want, you’ll see a sliding control to let you reduce the degree of the effect. After setting the level you want, click on ‘Back’ near the top of the panel to get access to all the usual Adobe Camera Raw Controls and process your image as normal.
Or
02 Select the profile in Lightroom CC
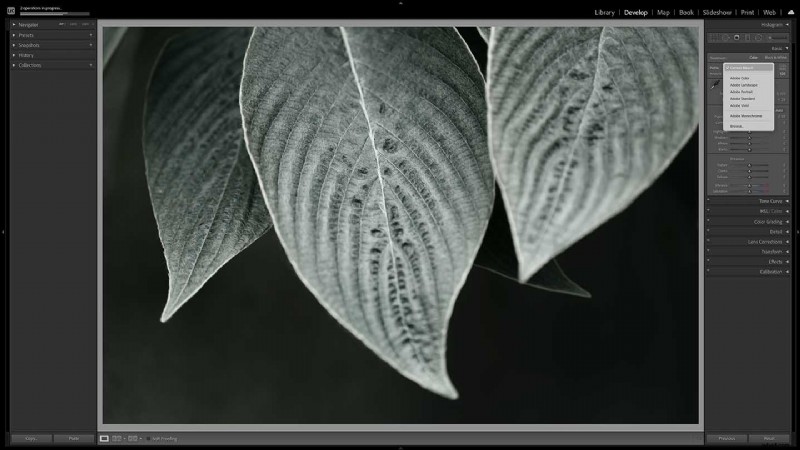
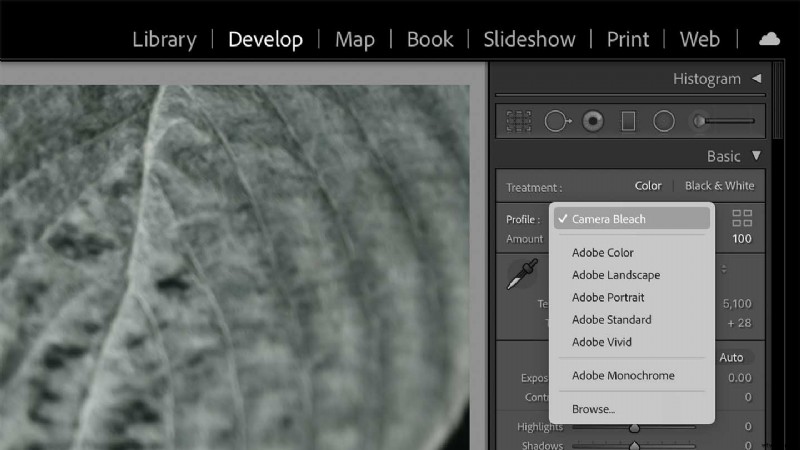

With your images imported into Lightroom CC, select the one you want to edit and click on ‘Develop’. Make sure that the Basic adjustment panel is open and click on the profile dropdown arrow. This is to the right of where it says ‘Profile’ followed by ‘Camera’ and the name of the Picture Control that was used at the shooting stage.
Click on ‘Browse’ beneath the Adobe options, and if necessary expand the ‘Camera Matching’ section to see the available Picture Control settings. As you hover over the thumbnails for each Picture Control settings, the main image will preview the effect. Simply click on the one you want to use. You can then use the control at the top of the panel to reduce the level of the effect. When you’re finished, click on ‘Close’ to return to the usual Lightroom editing panel and finsih your image as normal.